
We have introduced the Sitecore CLI several times in the past, and now that the latest version, Sitecore CLI 5.2, has been released, we will show you how to use it to perform export and import.
About Sitecore CLI
Sitecore CLI is provided as a command line interface for Sitecore CMS, and the latest version is 5.2.113 at the time of this blog post.
By using the command line, you can
- Content can be exported
- You can import content
- Can be performed with respect to publishing, indexing
- Can be connected to multiple environments and switched between them
- Works in a variety of environments
- NET 6.0 is supported on Windows, macOS, Linux, etc.
The target Sitecore versions are as follows
- Sitecore 10.1 / 10.2 / 10.3 (requires Management Service installation)
- Sitecore XM Cloud
For installation, please refer to the following page.
Also, if it is an XM Cloud project, running up.ps1 will automatically complete the installation.
Version upgrade
To check the version of Sitecore CLI running at hand, execute the following command.
PowerShell
PS C:\projects\xmc-demo-jp> dotnet sitecore --version
5.1.25+a9db85602a7cc6fcfb894d231337ed88887c6d5a
PS C:\projects\xmc-demo-jp>
In this case, 5.1.25 is installed. To upgrade to the latest version, first delete the contents of tools contained in the .config/dotnet-tools.json file. Then, execute the following command to complete the installation.
PowerShell
dotnet tool install Sitecore.CLI --version 5.2.113
Delete and initialize the .sitecore folder and the sitecore.json file to remove the old version of the data.
PowerShell
dotnet sitecore initThen install the following plug-ins to use XM Cloud plug-ins.
PowerShell
dotnet sitecore plugin add -n Sitecore.DevEx.Extensibility.XMCloudCheck that the installation is actually completed by using the following command.
PowerShell
dotnet sitecore plugin list
For the sitecore.json file created at the end, add settings related to the file to be imported.
JSON
"modules": ["src/*.module.json"],Also, change the item set in serialization to items.
JSON
"defaultModuleRelativeSerializationPath": "items",The command line upgrade is now complete.
Login to XM Cloud
Using the command line, first access XM Cloud for access.
PowerShell
dotnet sitecore cloud login --allow-writeIn the past, it was necessary to obtain the project list and environment list to obtain the environment id of the destination to be connected, and then check the ID to be used from the list.

Use the ID obtained from this screen to connect on the command line.
PowerShell
dotnet sitecore cloud environment connect --environment-id youridOnce executed, the connection was easily established.

Exporting XM Cloud content
From this point forward, we will proceed with the same steps as in the previous article.
This time, the name of the site is sitecoredemo-jp, so the elements in this section will change. Please add the following three files
src\InitItems.module.json
JSON
{
  "namespace": "InitItems",
  "items": {
    "includes": [
      {
        "name": "content-root",
        "path": "/sitecore/content",
        "scope": "singleItem",
        "allowedPushOperations": "createAndUpdate"
      }
    ]
  }
}
src\SitecoreDemo-Content.module.json
JSON
{
  "namespace": "SitecoreDemo-Content",
  "references": ["SitecoreDemo"],
  "items": {
    "includes": [
      {
        "name": "content",
        "path": "/sitecore/content/sitecoredemo-jp"
      },
      {
        "name": "media",
        "path": "/sitecore/media library/Project/sitecoredemo-jp"
      }
    ]
  }
}
src\SitecoreDemo.module.json
JSON
{
  "namespace": "SitecoreDemo",
  "references": ["InitItems"],
  "items": {
    "includes": [
      {
        "name": "placeholders",
        "path": "/sitecore/layout/Placeholder Settings/Project/sitecoredemo-jp"
      },
      {
        "name": "renderings",
        "path": "/sitecore/layout/Renderings/Project/sitecoredemo-jp"
      },
      {
        "name": "templates",
        "path": "/sitecore/templates/Project/sitecoredemo-jp"
      },
      {
        "name": "languages",
        "path": "/sitecore/system/Languages"
      }
    ]
  }
}
If you use the standard renderinghost.module.json file, you will be downloading the Rendering Host configuration in XM Cloud. This part of the environment is different from the Docker environment and is the reason why the local Experience Editor does not work. In order to exclude this part from the export, the file name is renderinghost.module.bak.
If you accidentally imported it as is, please set the following locally. The target item is /sitecore/system/Settings/Services/Rendering Hosts/Default.
Settings | Value |
|---|---|
Server side rendering engine endpoint URL | http://rendering:3000/api/editing/render |
Server side rendering engine application URL | http://rendering:3000 |
Then change the value of allowWrite from false to true in the development settings defined in the .sitecore\user.json file. Now you are ready to export.
PowerShell
dotnet sitecore ser pull -n developmentOnce this is done, the export is complete.

Importing into the local environment
Exported data can be imported into the local environment to recreate the cloud environment at hand.
If the .sitecore\user.json file does not have the following definition, please add it. If you have specified a local Sitecore instance as the standard login destination, you can use it.
JSON
    "default": {
      "ref": "xmcloud",
      "allowWrite": true,
      "host": "https://xmcloudcm.localhost",
      "variables": {}
    }
Now that you are ready, login to your local Sitecore environment.
PowerShell
dotnet sitecore login --allow-write true Once the browser is up and logged in, data is imported into the local Sitecore.
PowerShell
dotnet sitecore ser push
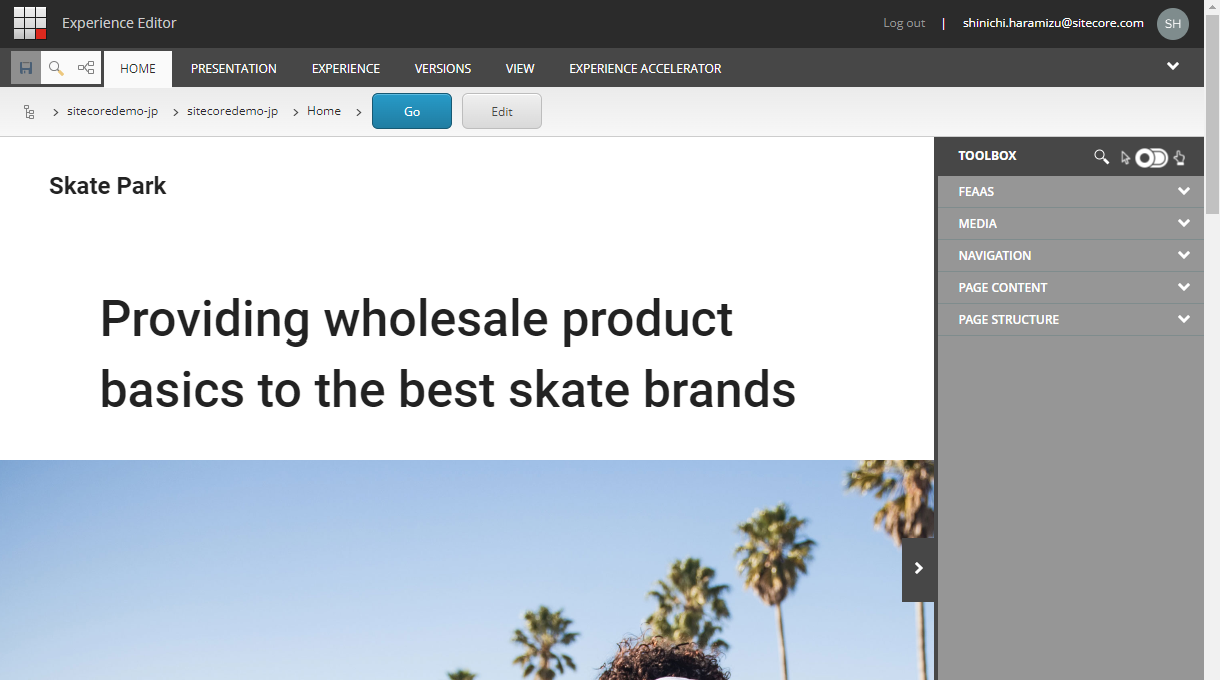
Once the data has been imported, open the content editor as shown below to see that it contains information about the site.

This completes the configuration and starts the Experience Editor. If an error occurs, the following steps can be interspersed to ensure correct operation.
- Add a new Rendering Host under /sitecore/system/Settings/Services/Rendering Hosts ( Docker )
- Save the item that holds the site settings, in this case /sitecore/content/sitecoredemo-jp/sitecoredemo-jp/Settings/Site Grouping/sitecoredemo-jp, as a newly created item. Predefined application rendering host in /sitecorecontent/sitecoredemo-jp/Settings/Site Grouping/sitecoredemo-jp/Settings/Site Grouping/sitecoredemo-jp
- Save once, then revert to Default and save again.
Summary
In this article, we upgraded the command line environment to the latest version, and also reintroduced the procedure for exchanging content in the form of exporting after connecting to the XM Cloud environment, and importing to the environment at hand.