
I'll introduce how to sync a local XM Cloud environment with the SaaS XM Cloud environment. While I’m syncing everything at once here, in an actual development setting, you'd sync only the necessary data to manage volume.
Prepare an environment for import and export
First, access the content editor in your local XM Cloud environment. You will see that there are no items as shown below.

Now let's set up the environment at the top of the local repository using the Sitecore CLI commands. First, login to XM Cloud by running the command dotnet sitecore cloud login --allow-write true.
PowerShell
PS C:\projects\sxastarter> dotnet sitecore cloud login --allow-write true
[DeviceLogin] User Code : VVBK-FDTH
[DeviceLogin] Authentication url : https://auth.sitecorecloud.io/activate?user_code=VVBK-FDTH
[DeviceLogin] Authorization pending. Waiting.
PS C:\projects\sxastarter>
Please log in to the XM Cloud environment with your browser, as your browser will launch once you log in.

The next step is to obtain which environment the local projects connect to. First, we will retrieve the list of projects deployed in XM Cloud. The command is dotnet sitecore cloud project list.
PowerShell
PS C:\projects\sxastarter> dotnet sitecore cloud project list

sxastarter Project detailed information:
Organization Name : sitecore-saas-ops-sales-engineers-16
Organization Id   : org_demodemodemodemo
Project Id        : 4KRUJ3FMWIJaDsBIod0oAL
Project name      : sxastarter
Region            : jpe (Japan East)
Created by        : shinhara@example.com
Created at        : 2022/11/14 4:29:57
Last updated by   : shinhara@example.com
Last updated at   : 2022/11/14 4:29:57

PS C:\projects\sxastarter>
The ID of the project can be retrieved from the list. Using this ID, we can now run the command dotnet sitecore cloud environment list --project-id projectid to get a list of environments.
PowerShell
PS C:\projects\sxastarter> dotnet sitecore cloud environment list --project-id 4KRUJ3FMWIJaDsBIod0oAL
Found 1 environment(s)
development Environment detailed information:
Organization Id                   : org_demodemodemodemo
Organization Name                 : sitecore-saas-ops-sales-engineers-16
Project Id                        : 4KRUJ3FMWIJaDsBIod0oAL
Project name                      : sxastarter
Environment Id                    : 5lCcnEfcWlVfZLjbRyboNq
Environment Name                  : development
Environment Host                  : xmc-sitecoresaademo-sxastarter-development.sitecorecloud.io
Environment Type                  : nonprod
Created by                        : shinhara@example.com
Created at                        : 2022/11/14 4:29:59
Last updated by                   : shinhara@example.com
Last updated at                   : 2022/11/14 6:29:45
Provisioning status               : Complete
Provisioning last failure message :

PS C:\projects\sxastarter>
If your project has more than one environment available, select the most appropriate environment. Then, use the following command to make a connection using the environment ID.
PowerShell
PS C:\projects\sxastarter> dotnet sitecore cloud environment connect --environment-id 5lCcnEfcWlVfZLjbRyboNq
Connecting to the environment...
PS C:\projects\sxastarter>
We are now ready to connect to the environment. The next step is to create the Index and name the environment. In this case, we did the following
PowerShell
PS C:\projects\sxastarter> dotnet sitecore index list --environment-name development
Indexes list:
sitecore_core_index
sitecore_master_index
sitecore_web_index
sitecore_horizon_index
PS C:\projects\sxastarter>
Setting up data to be linked
The Sitecore CLI commands will create a yml file in the items folder by referencing the json file, which by default is located directly under src. In this case, the required item definitions will be created as the following three files. Note that although we created the website using sxastarter this time, the paths to the following json files will be different if they are different.
The first step is the src\InitItems.module.json file.
JSON
{
    "namespace": "InitItems",
    "items" : {
        "includes": [
            {
                "name": "content-root",
                "path": "/sitecore/content",
                "scope": "singleItem",
                "allowedPushOperations": "createAndUpdate"
            }
        ]
    }
}
Next is the src\SitecoreDemo-Content.module.json file.
JSON
{
    "namespace": "SitecoreDemo-Content",
    "references": [ "SitecoreDemo" ],
    "items": {
        "includes": [
            {
                "name": "content",
                "path": "/sitecore/content/sxastarter"
            },
            {
                "name": "media",
                "path": "/sitecore/media library/Project/sxastarter"
            }
        ]
    }
}
Finally, the src\SitecoreDemo.module.json.
JSON
{
    "namespace": "SitecoreDemo",
    "references": [ "InitItems" ],
    "items": {
        "includes": [
            {
                "name": "placeholders",
                "path": "/sitecore/layout/Placeholder Settings/Project/sxastarter"
            },
            {
                "name": "renderings",
                "path": "/sitecore/layout/Renderings/Project/sxastarter"
            },
            {
                "name": "templates",
                "path": "/sitecore/templates/Project/sxastarter"
            },
            {
                "name": "languages",
                "path": "/sitecore/system/Languages"
            }
        ]
    }
}
After creating the above three json files, set allowWrite to true in the following files so that importing and other operations can be performed.
JSON
    "development": {
      "ref": "XmCloud",
      "allowWrite": true,
      "host": "https://xmc-sitecoresaademo-sxastarter-development.sitecorecloud.io/",
      "variables": {}
    }
This completes the preparation.
Data acquisition and reflection
First, data is retrieved from the cloud environment. The following command will create a yaml file with the data of many items in `src\items`.
PowerShell
dotnet sitecore ser pull -n developmentMake sure you have retrieved the item data from the XM Cloud deployed in SaaS and push it to your local environment (default).
PowerShell
dotnet sitecore ser push -n defaultAt this stage, all items in the SaaS version of XM Cloud have been deployed locally, with the exception of the Node.js Docker container, which is not available as a SaaS instance when running locally. This definition is set to /sitecore/system/Settings/Services/Rendering Hosts/Default in the Sitecore item.
- Server side rendering engine endpoint URL: http://rendering:3000/api/editing/render
- Server side rendering engine application URL: http://rendering:3000

To reflect the data in the item again, execute the following command.
PowerShell
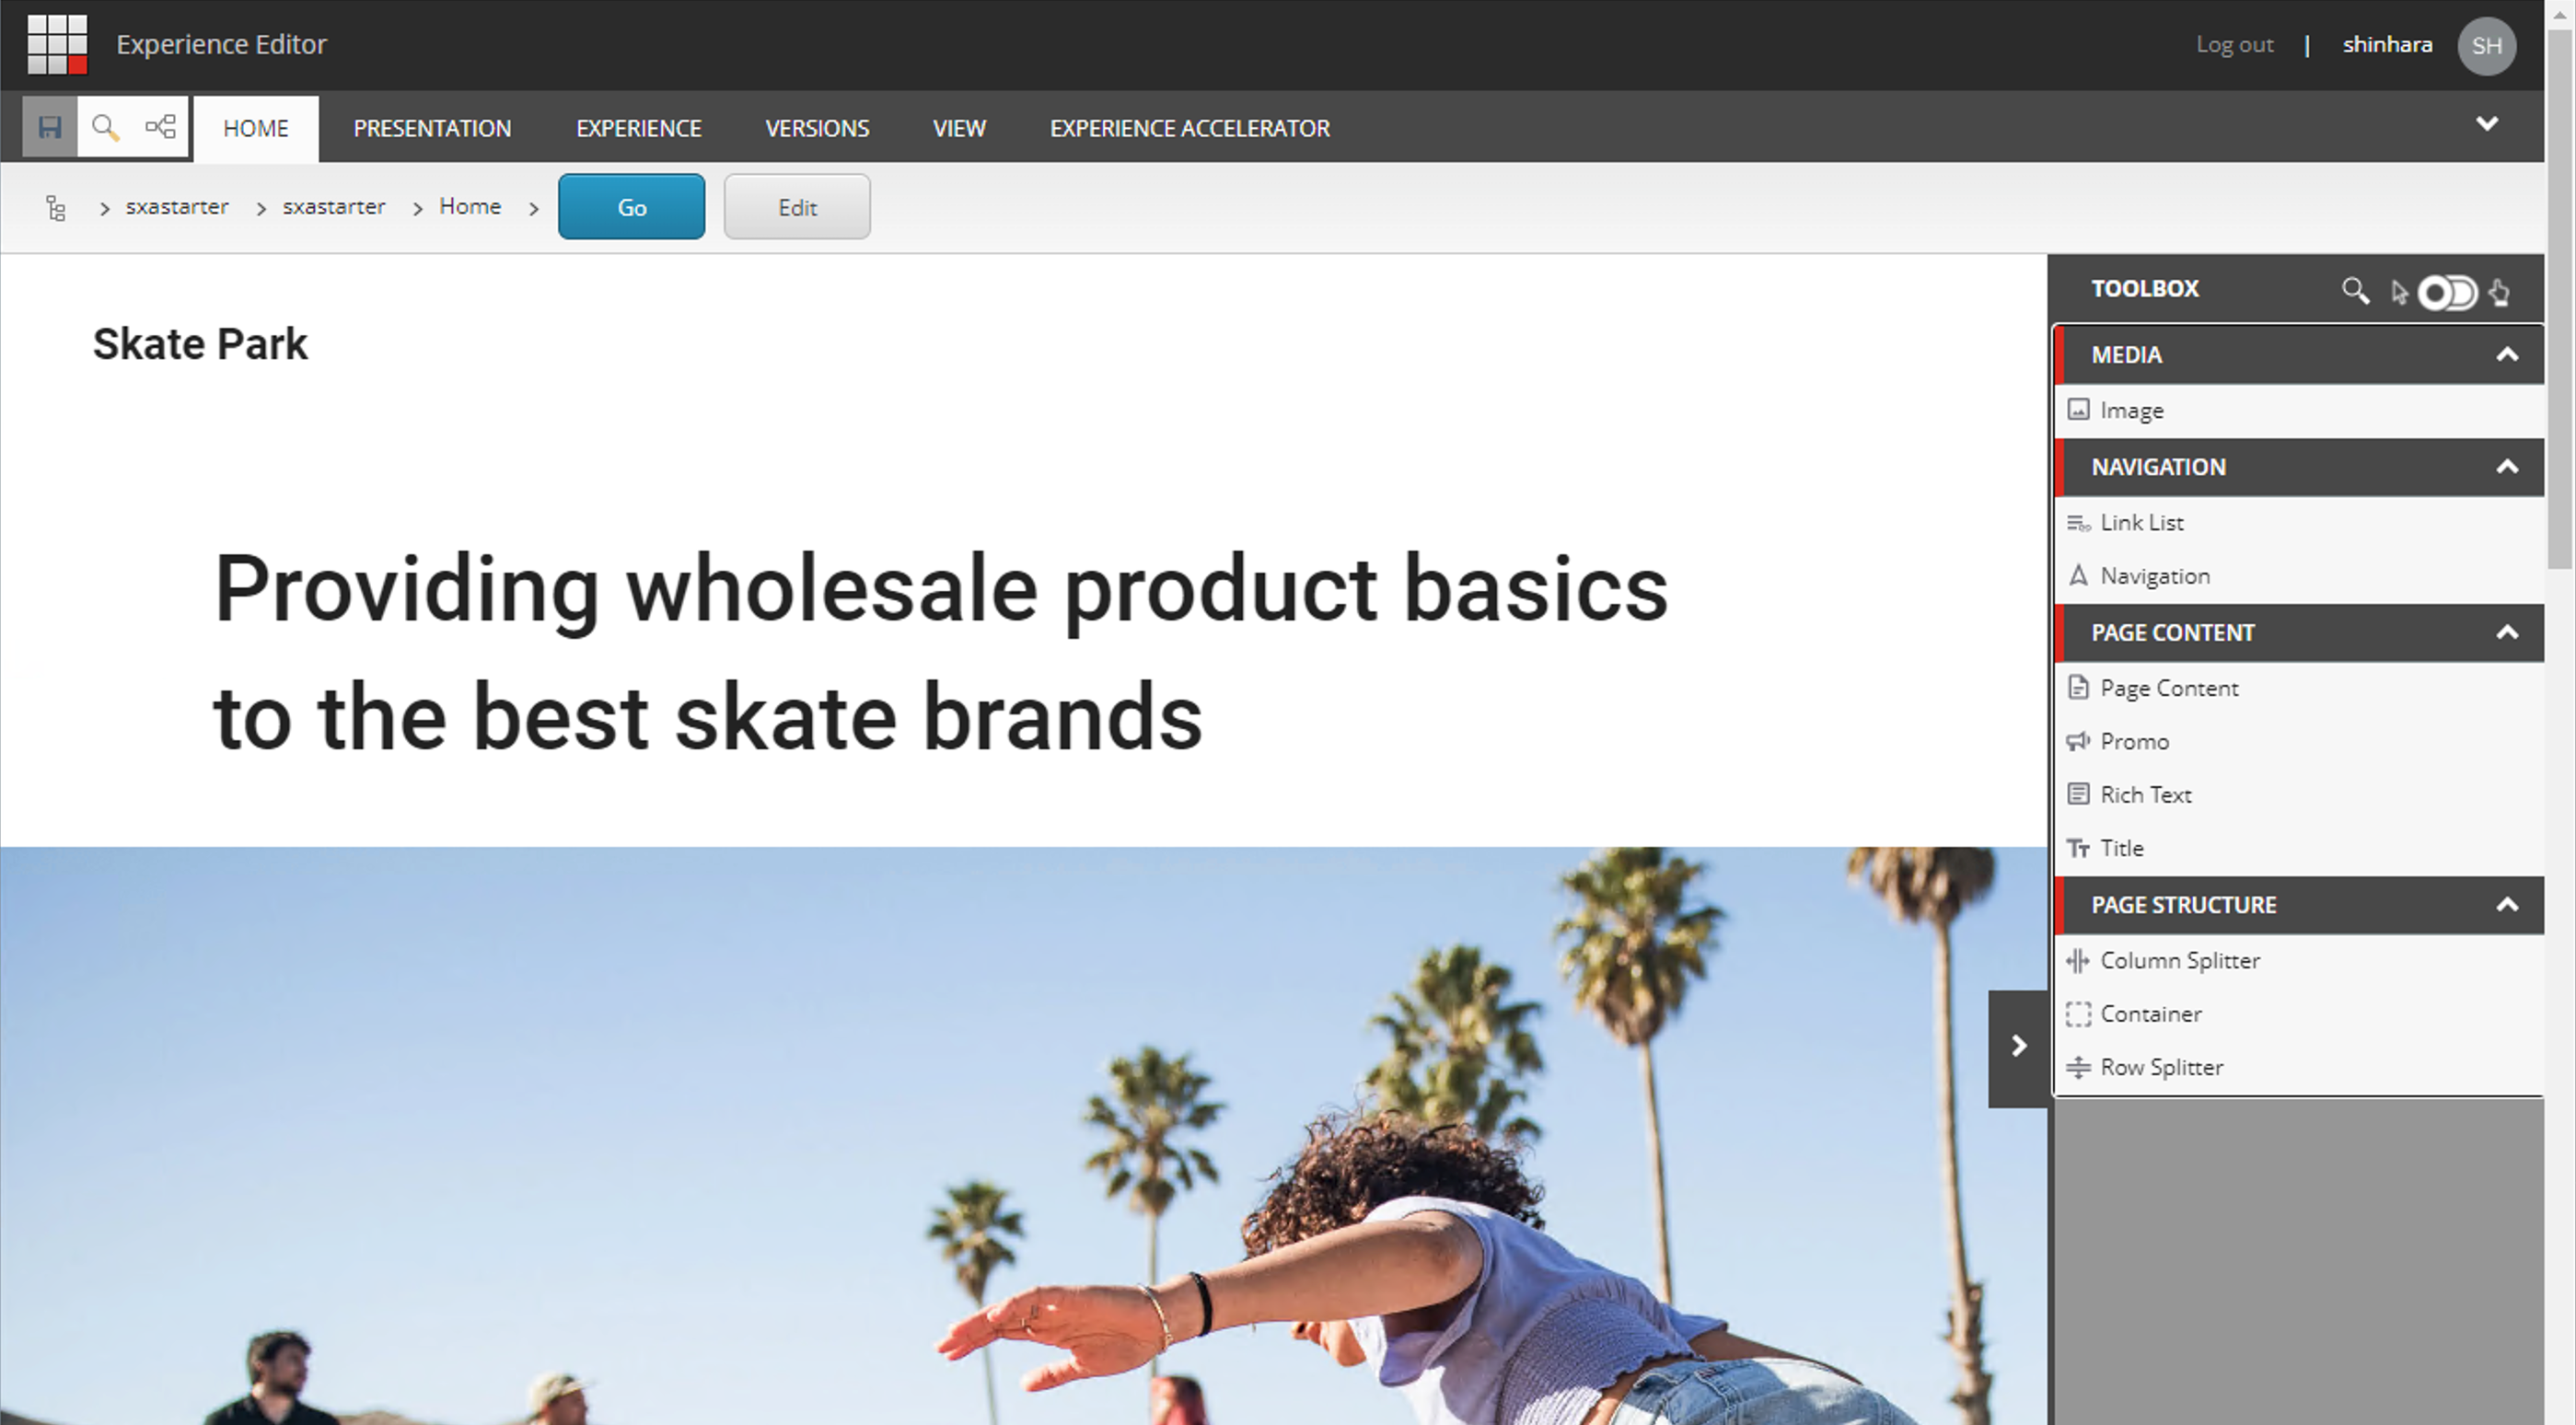
dotnet sitecore ser pull -n defaultThe data import is now complete. Launch the Experience Editor in your local XM Cloud and you should now be able to edit as you see fit, as shown below.
Summary
By understanding the above procedures, you will be able to start and develop locally on the same server as the XM Cloud environment deployed as a SaaS CMS. You can proceed with development by developing at hand, running tests, and adding necessary items to the project.
A video digest of the above content is available on YouTube. Please refer to it.