
To enable working with custom images using the Sitecore CLI, we need to add Sitecore Management Services. Without this on the CM server, the CLI won't function. This guide covers container setup, while for other environments, please install via package.
Configuring Sitecore CLI
First, we will proceed to configure the Sitecore CLI so that it can be used in the current project. The detailed configuration procedure is described in the following page.
This time, we will execute the following commands in the project folder.
PowerShell
dotnet new tool-manifest
dotnet tool install Sitecore.CLI
dotnet sitecore init
dotnet sitecore plugin add -n Sitecore.DevEx.Extensibility.Serialization
dotnet sitecore plugin add -n Sitecore.DevEx.Extensibility.Publishing
Access Sitecore running in this state.
PowerShell
dotnet sitecore login --cm https://cm.sitecoredemojp.localhost/ --auth https://id.sitecoredemojp.localhost/ --allow-write true
You have successfully logged in. Now we will update the schema with the following command
PowerShell
dotnet sitecore index schema-populateHowever, an error is displayed. This error occurs when Sitecore Management Services is not installed.

Installing Sitecore Management Service
In order to install the module, a definition to install the module must be added to the file docker\build\cm\Dockerfile in which the container image that will serve as the CM server is built. The reference for this module is as follows
This information will be put into the project's configuration file.
First add the following one line to your .env file. This is in the form of setting up an image repository.
PowerShell
MANAGEMENT_SERVICES_VERSION=4.2-1809This just puts the definition in .env, so docker compose cannot determine which instance to put it in. This time, add a line to the docker-compose.override.yml file.
Dockerfile
  cm:
    build:
      args:
        MANAGEMENT_SERVICES_IMAGE: ${SITECORE_MODULE_REGISTRY}sitecore-management-services-xm1-assets:${MANAGEMENT_SERVICES_VERSION}
Finally, update the docker\build\cm\Dockerfile file. This is also a direct reference to the code in the above reference.
Dockerfile
ARG MANAGEMENT_SERVICES_IMAGE

FROM ${MANAGEMENT_SERVICES_IMAGE} as management_services

# Copy the Sitecore Management Services Module
COPY --from=management_services C:\module\cm\content C:\inetpub\wwwroot
Once the above settings are complete, build the cm image again.
PowerShell
docker-compose build cmYou now have an image with the Sitecore Management Service installed. Start the container.
PowerShell
docker-compose up -d
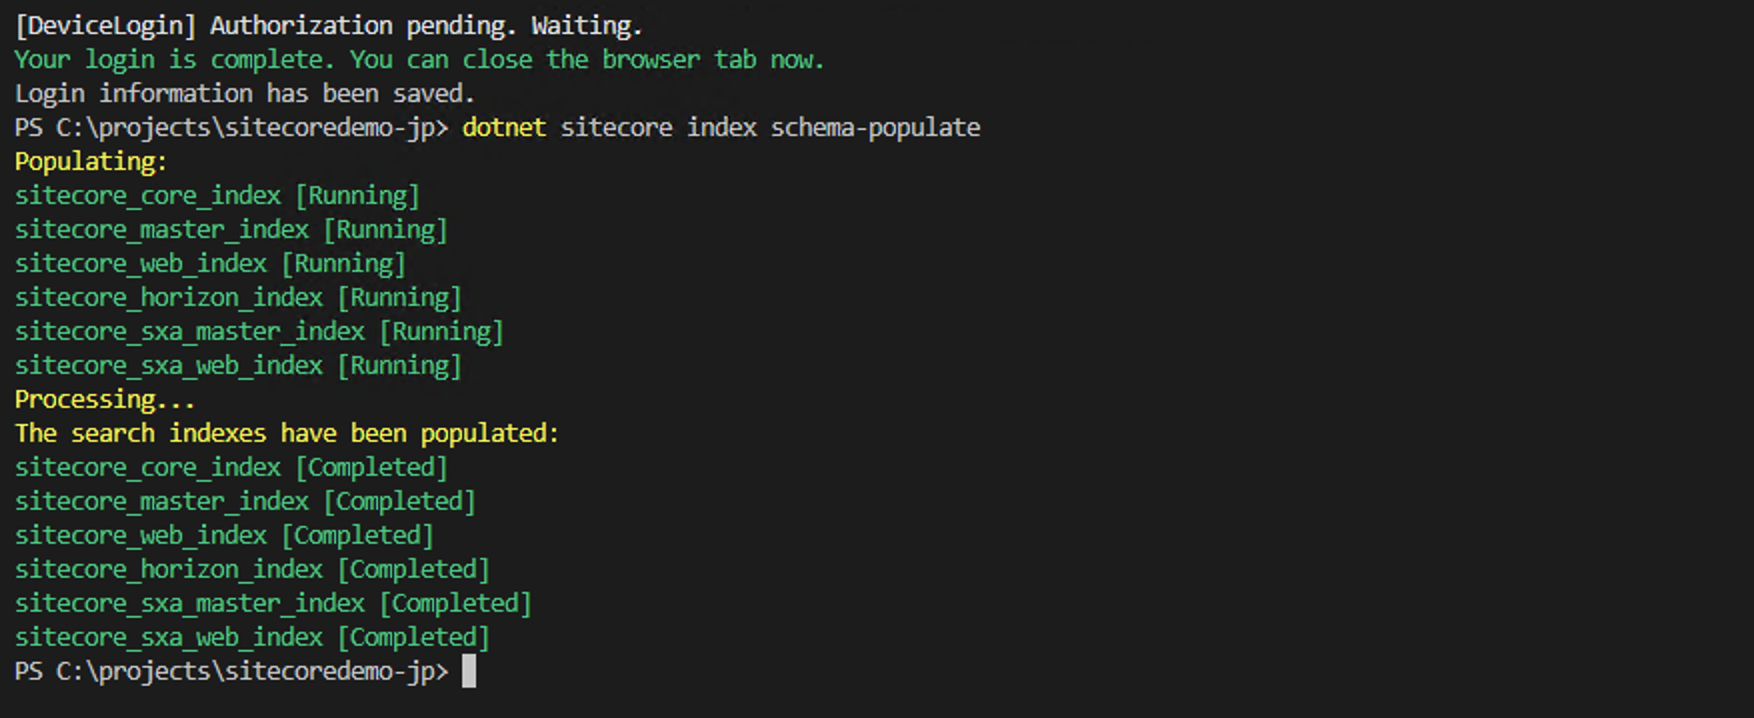
After logging in, run the command to confirm that the module has been installed correctly. Note that if you have successfully logged in with the server name and other information last time, the server name and other information in the `.sitecore\user.json` file will be listed, so you can proceed simply by logging in.
PowerShell
dotnet sitecore login
dotnet sitecore index schema-populate
We have successfully accessed and controlled the Sitecore instance through the Sitecore CLI.
Summary
In this article, we showed you how to include Sitecore Management Services, which are required to use the Sitecore CLI, in your image. We have confirmed that once defined, they can be added relatively easily.