
In the last issue, we ran the Headless SSR project at hand to see if the pages could be displayed. This time, we will introduce the procedure for deploying the project on various platforms.
Create a repository on Github
Register the code you have been working on at hand in Github. If you are familiar with git commands, you can use the command line only.
Create local repository
First, launch Github Desktop and click File - Add Local Repository.

Select the target directory.

If you make a selection, the following dialog box will appear, asking if you want to create a Git repository because you don't have one.

As far as creation is concerned, there is no problem proceeding with the default.

Create a repository on GitHub
When completed, Publish your repository to GitHub will be displayed.

Clicking the Publish repository button displays the following dialog.

Be sure to deploy it privately, as it contains API keys, etc. Click to create a repository on GitHub.

Heroku
Heroku is an application platform provided by Salesforce. Some services are free for developers to use, so we will expand on that scope in this article.
Publish Preparation
When deploying to Heroku, you will need to change the configuration in package.json as there is no support for yarn. The default code is as follows
JSON
"engines": {
    "node": ">=8.1",
    "npm": ">=5.6.0",
    "yarn": "yarn is not supported, please use npm"
},
Delete the last item.
JSON
"engines": {
    "node": ">=8.1",
    "npm": ">=5.6.0"
},
After the code is removed, it must be reflected in the repository on Github.
I am editing using Visual Studio Code, so I click on the Git icon on the left. Then you will see that the package.json file has been changed.

Enter a message to commit and click the check mark at the top to commit. Then click the ・・・ icon in the upper right corner and select push to reflect the message on GitHub.
Deploy to Heroku
It is assumed that you have already created an account on Heroku. After logging in, you will see the following screen.

Click on the Create new app button. You will then be prompted to enter a name for the app.

Enter a name for the app and click Create app. The page will switch and the app configuration screen will appear with the Deploy tab open.

This time, click on the GitHub icon to link with a GitHub repository. You will be taken to a screen where you can search for linked GitHub repositories.

Do a search and click the Connect button to the right of the target repository.

You will see a button to select the branch to deploy and whether or not to deploy automatically.

In this case, the main branch is selected, and since this is a test, Automatic Deploys is not selected. This is a test, so Automatic Deploys will not be selected. Finally, click the Deploy Branch button at the bottom to start deployment.

At the end of the log, the URL is displayed.

Accessing the URL shows that the delivery server is working.

Azure Web App
The following are the steps to deploy to Azure Web App.
Creating Web Apps
Create a web app from the Azure management portal.

Please prepare the resource groups, etc. to be added, either existing or creating new ones if necessary. The following items are introduced here.

A sample of items is as follows
Parameters | Description | Sample |
|---|---|---|
Name | Web app name | react-app-cd |
Public | Select code to expand and move code | Code |
Runtime Stack | Selecting the Web App Runtime | Node 14 LTS |
Operating system | Select OS | Linux |
Region | Datacenter | Japan East |
The following screenshots have been entered.

Then click Next: Deploy at the bottom of the screen. The screen will change as follows

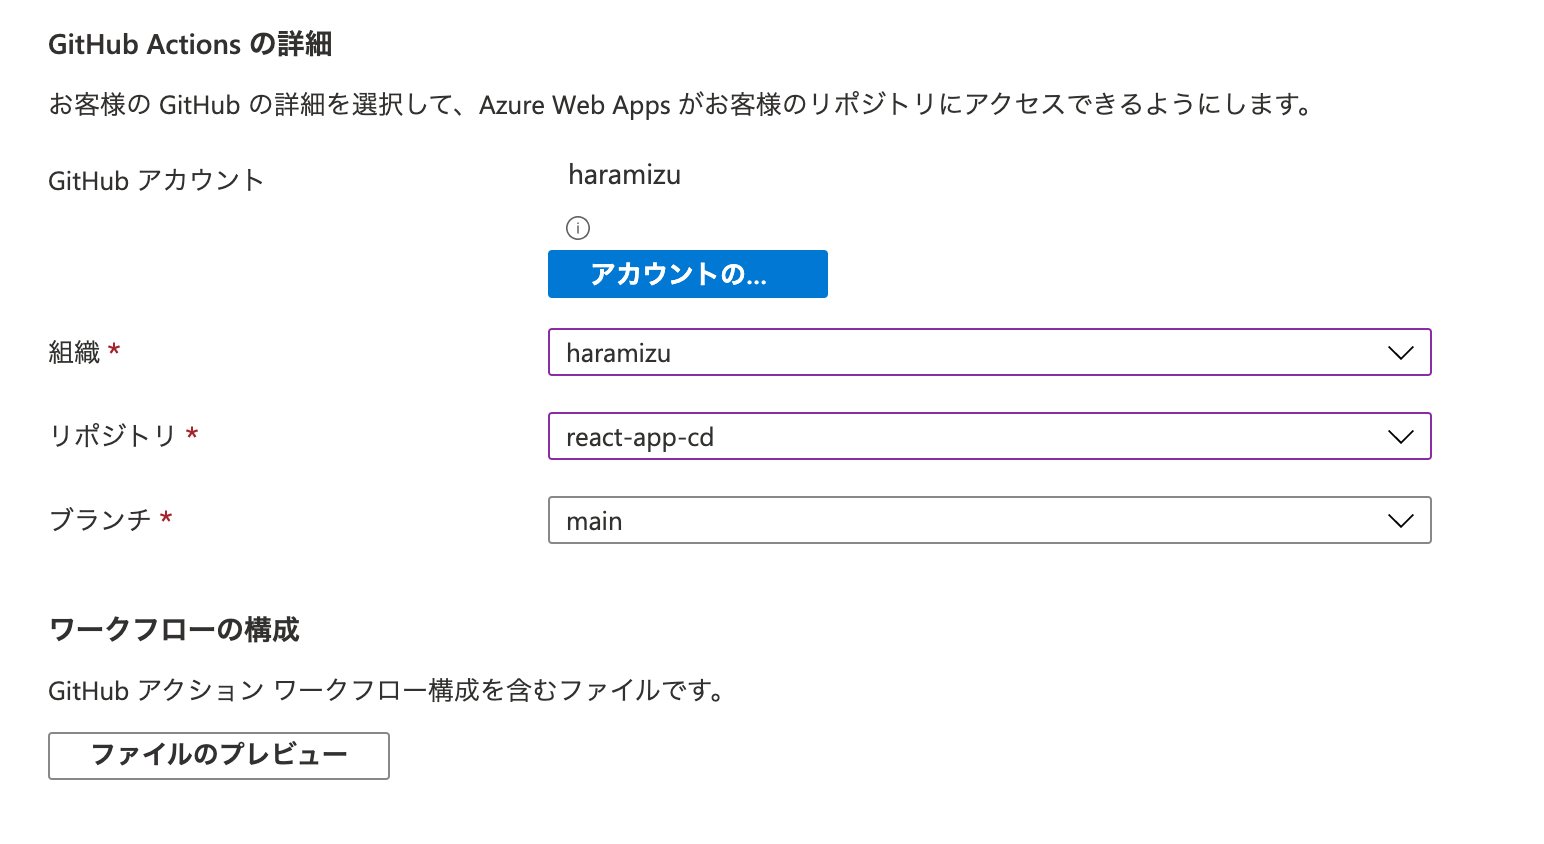
Select "Activate" to switch the screen again, connect your GitHub account, and select the necessary items.
After completing the input, click Confirm and Create, then click the Create button to create the resource.

Operation check
After creation is complete, switch to the App Service screen.

Switch to the Deployment Center and check the logs for successful deployment.

Once the build has been successfully completed, access the URL. The page will appear as follows

Summary
In this article, I introduced how to link GitHub repositories to two platforms, Heroku and Azure web apps, to set up a site. You can also check the status of the site by deploying it to staging before main.
Both heroku and Azure web apps also provide auto-scale functionality, making JSS an option for cloud-based site operations.
- Headless SSR - Part.1
- Headless SSR - Part.2
- Headless SSR - Part.3