
Docker support has been introduced in Sitecore Experience Platform 10.0. In the last issue, we introduced the procedure for setting up an XP0 environment. This time, we will try to set up an XP1 environment and change the domain name settings.
- Docker-related articles are summarized in the Docker series.
Previous Review
In my previous article on running Sitecore 10 on Docker, I set up an XP0 environment (same CM and CD). Since the domain name was set up as localhost, we created our own certificate and used it to set up the test environment.
This time, while assuming that the environment created in the previous article will be used, we will show how to apply a wildcard certificate to the XP1 environment (CM and CD are separate), which has the same topology as the previous article. We will also write commands without the previous explanation.
Prerequisite
We will be working in the folder C:\projects\compose\compose\ltsc2019\xp1 because this time we will use the xp1 configuration, which is the folder and box next to the one we expanded last time. The .env file looks like this
Plain Text
COMPOSE_PROJECT_NAME=sitecore-xp1
SITECORE_DOCKER_REGISTRY=scr.sitecore.com/sxp/
SITECORE_VERSION=10.0.0-ltsc2019
SITECORE_ADMIN_PASSWORD=
SQL_SA_PASSWORD=
REPORTING_API_KEY=
TELERIK_ENCRYPTION_KEY=
SITECORE_IDSECRET=
SITECORE_ID_CERTIFICATE=
SITECORE_ID_CERTIFICATE_PASSWORD=
SITECORE_LICENSE=
CD_HOST=xp1cd.localhost
CM_HOST=xp1cm.localhost
ID_HOST=xp1id.localhost
TRAEFIK_IMAGE=traefik:v2.2.0-windowsservercore-1809
TRAEFIK_ISOLATION=hyperv
ISOLATION=default
The table is as follows. The only differences are the different COMPOSE_PROJECT_NAME (XP0 vs. XP1) and the addition of the CD_HOST and REPORTING_API_KEY fields.
Parameter | Value |
|---|---|
COMPOSE_PROJECT_NAME | sitecore-xp1 |
SITECORE_DOCKER_REGISTRY | scr.sitecore.com/sxp/ |
SITECORE_VERSION | 10.0.0-ltsc2019 |
SITECORE_ADMIN_PASSWORD | |
SQL_SA_PASSWORD | |
REPORTING_API_KEY | |
TELERIK_ENCRYPTION_KEY | |
SITECORE_IDSECRET | |
SITECORE_ID_CERTIFICATE | |
SITECORE_ID_CERTIFICATE_PASSWORD | |
SITECORE_LICENSE | |
CD_HOST | xp1cd.localhost |
CM_HOST | xp1cm.localhost |
ID_HOST | xp1id.localhost |
TRAEFIK_IMAGE | traefik:v2.2.0-windowsservercore-1809 |
TRAEFIK_ISOLATION | hyperv |
ISOLATION | default |
REPORTING_API_KEY is to be set to a random key from 64 to 128 characters. The following commands are added here.
Plain Text
Set-DockerComposeEnvFileVariable "REPORTING_API_KEY" -Value (Get-SitecoreRandomString 128 -DisallowSpecial)
We will use the domain name cmsdemo.jp, which is often used by Sitecore for demo sites. Therefore, we will change the following three items.
Plain Text
CD_HOST=xp1cd.cmsdemo.jp
CM_HOST=xp1cm.cmsdemo.jp
ID_HOST=xp1id.cmsdemo.jp
For cmsdemo.jp, a wildcard certificate is created using Let's encrypt. Now, except for the Identity Server section, we will proceed with the configuration referring to the previous article.
PowerShell
Add-HostsEntry "xp1cd.cmsdemo.jp"
Add-HostsEntry "xp1cm.cmsdemo.jp"
Add-HostsEntry "xp1id.cmsdemo.jp"
As for the environment settings, the only difference from the last time is the above. Other than that, please proceed with the same procedure.
Certificate Preparation
Previously, we used mkcert to create a certificate, but we will use a formal certificate.
Installing OpenSSL Commands
The certificate file we are preparing this time is a pfx-type file called cmsdemo20201124.pfx with a password set. Since this file cannot be used in the Docker environment as is, OpenSSL is installed to output the key and certificate from the PFX type file.
For installation, again, use the choco command.
PowerShell
choco install openssl
When the installation is complete, you will see a message that the Path has changed, so close the PowerShell screen once and start anew in a separate window. You can now use the Openssl commands.
Creation of PEM files
First, copy the file cmsdemo20201124.pfx to the folder c:\projects
Then, go to the folder where the file is to be created and execute the command as follows.
PowerShell
cd C:\projects\compose\ltsc2019\xp1\traefik\certs
openssl pkcs12 -in "/projects/cmsdemo20201124.pfx" -clcerts -nokeys -out _wildcard.cmsdemo.jp.pem
openssl pkcs12 -in "/projects/cmsdemo20201124.pfx" -nocerts -nodes -out _wildcard.cmsdemo.jp-key.pem
When you run the Openssl command, you will be prompted to enter the pfx password, so please enter the password each time.

Next, you will find the configuration file certs_config.yaml in the config↪Ldynamic folder under the folder C:\projects\compose\ltsc2019\xp1\traefik. Rewrite it as follows.
YAML
tls:
  certificates:
    - certFile: C:\etc\traefik\certs\_wildcard.cmsdemo.jp.pem
      keyFile: C:\etc\traefik\certs\_wildcard.cmsdemo.jp-key.pem

Start Sitecore
Now that the preparations are complete, it is time to start the container.
PowerShell
docker-compose up -dSince we used the XP0 image last time, we will download the XP1 image again. This will not take as long as the last time since there are some common parts.
When the startup is complete, you will see that multiple containers have been started as shown below.

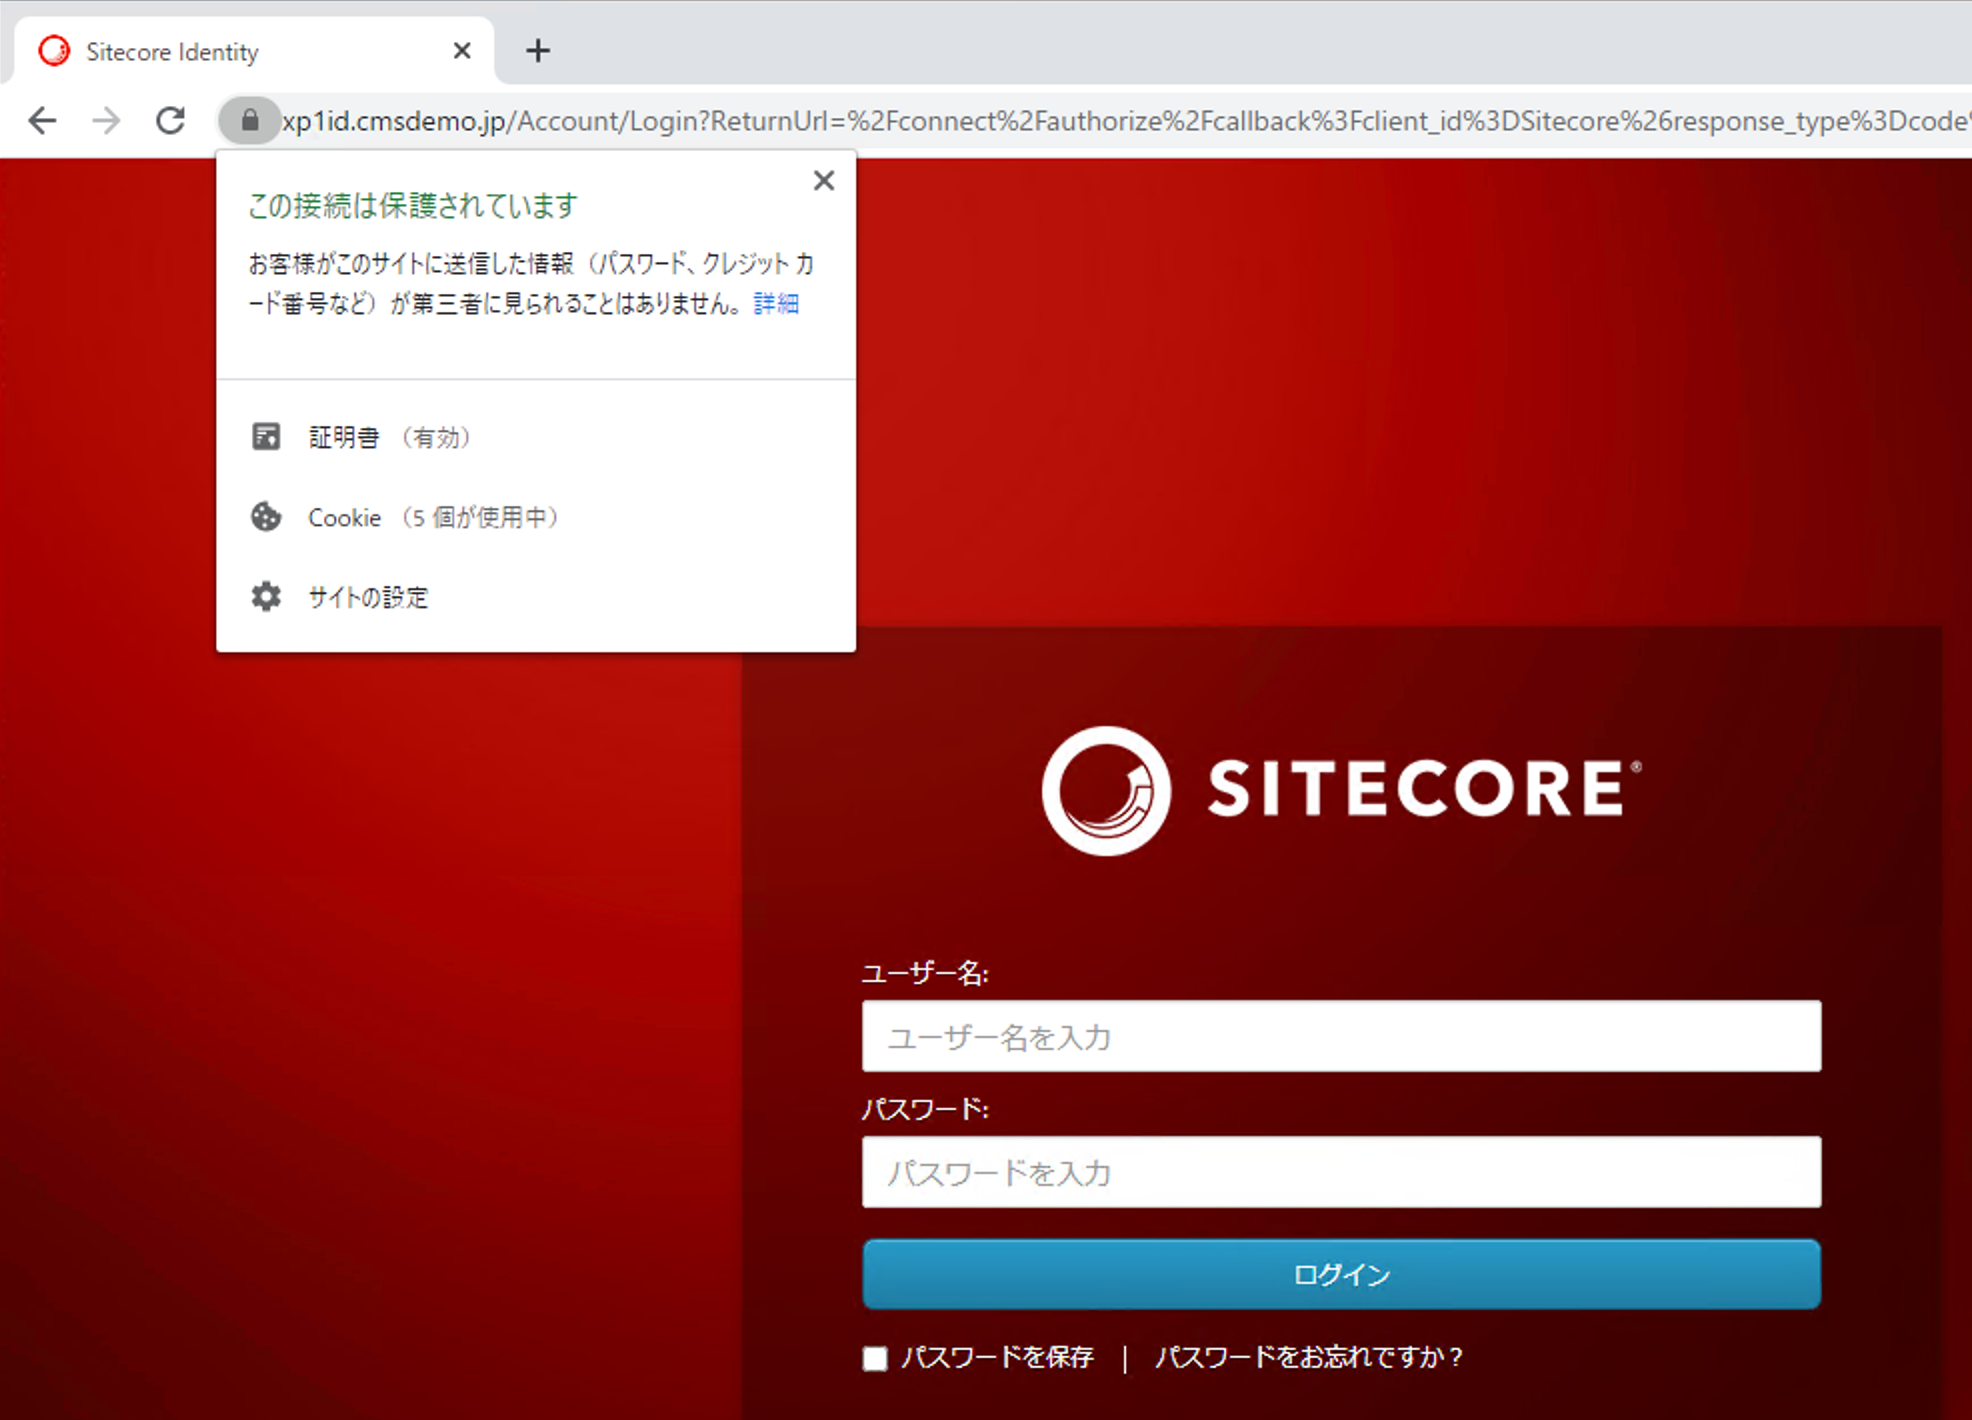
Access and check to see if the certificate you are setting up is valid.
- Access to https://xp1cm.cmsdemo.jp
- Make sure the Welcome page is displayed
- Check to see if the certificate is set (click on the browser key to see it).

- Add /sitecore to the URL and log in to the administration page
- Verify that the certificate is valid on the login screen