
Continuing from the last project, we'll add a headless site and integrate it with a Next.js project. Since the process is lengthy, this time we'll focus on adding the headless site and serializing its data for reuse.
Adding a Headless tenant
In the already prepared instance of XM, we will add a site. First, add a JSS tenant.

In this case, we will use sitecoredemo-jp.

Then add a JSS site in the tenant. Right-click on the site and a menu for adding a site will appear.

As for the name of the site, it should be `sitecoredemo-jp`.

The module to be used selects all functions.

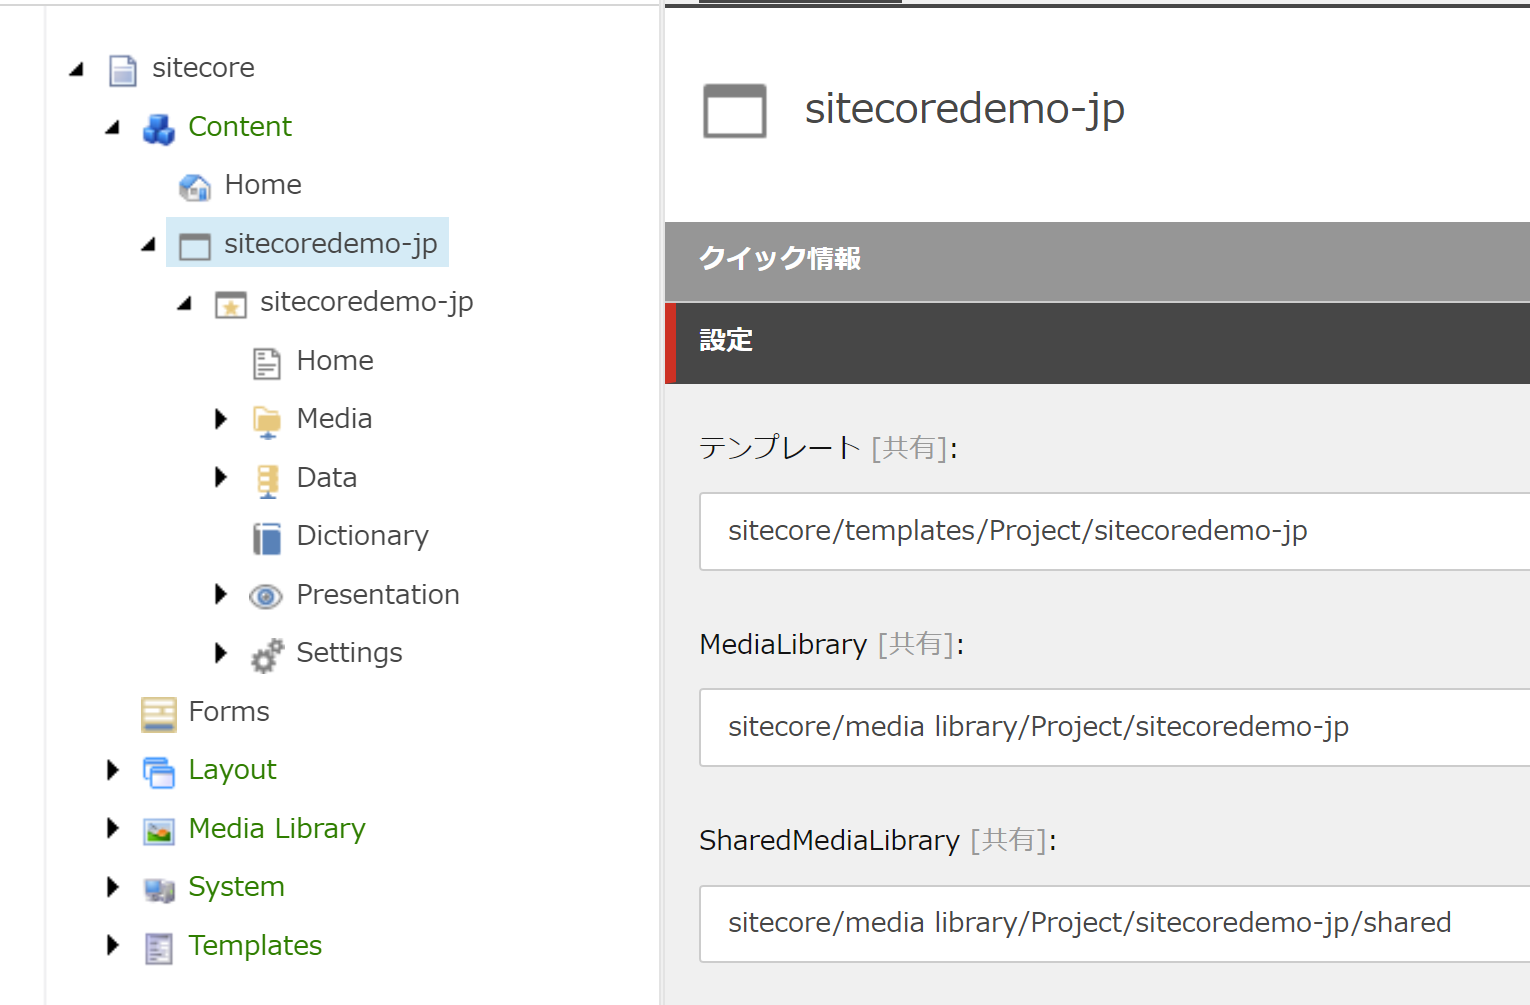
Once the above steps are completed, the site will be added as follows
Serialize the created data
In this case, we created a new site, but as with Japanese resources, it would be time-consuming to do the same work again after cleaning up the site. Therefore, we would like to perform serialization so that we can return to the created data at any time.
This is where we will use the Sitecore CLI. Run the following command at the top level of the project to first be able to write to Sitecore from the command line.
PowerShell
dotnet sitecore login --cm https://cm.sitecoredemo.localhost/ --auth https://id.sitecoredemo.localhost/ --allow-write trueThe login screen will appear, and you will be asked to confirm that you are allowed to access the system as follows.

Please allow it here. Next, before retrieving the items created by Sitecore, we need to reflect the API key provided by the project on the site. Before executing the command, temporarily change the extension of the json files directly under src to .txt in order to use only the file src\InitItems.module.json. After the change, import the API key using the following command.
PowerShell
dotnet sitecore ser push
After execution, you will see that the API key has been imported in the content editor.

To serialize the data for the site you have just created, change the extensions of the two files you modified before this step back to json.
Since we have created the site in a different form this time than the standard path provided, we will adjust the paths for the two files. The paths below will vary depending on the name of the site created, so refer to the paths deployed in the CMS accordingly.
JSON
{
    "namespace": "DockerStarter",
    "references": [ "InitItems" ],
    "items": {
        "includes": [
            {
                "name": "layouts",
                "path": "/sitecore/layout/Layouts/Project"
            },
            {
                "name": "placeholders",
                "path": "/sitecore/layout/Placeholder Settings/Project/sitecoredemo-jp"
            },
            {
                "name": "renderings",
                "path": "/sitecore/layout/Renderings/Project/sitecoredemo-jp"
            },
            {
                "name": "templates",
                "path": "/sitecore/templates/Project/sitecoredemo-jp"
            }
        ]
    }
}
The file regarding the other content should be changed as follows
JSON
{
    "namespace": "DockerStarter-Content",
    "references": [ "DockerStarter" ],
    "items": {
        "includes": [
            {
                "name": "content",
                "path": "/sitecore/content/sitecoredemo-jp"
            },
            {
                "name": "media",
                "path": "/sitecore/media library/Project/sitecoredemo-jp"
            }
        ]
    }
}
After making the above changes, execute the following command
PowerShell
dotnet sitecore ser pull
The data of the created site is serialized and a yaml file is created under the items folder.

Add Core database items
All of the above data was processed for serialization with respect to the Master database. Since we are adding Japanese as a language setting, we will also export the items in the core database as serialization. This time, we added the last item in the file `src\InitItems.module.json` in the form of `core-language` as follows.
JSON
{
    "namespace": "InitItems",
    "items" : {
        "includes": [
            {
                "name": "content-root",
                "path": "/sitecore/content",
                "scope": "singleItem",
                "allowedPushOperations": "createAndUpdate"
            },
            {
                "name": "api-key",
                "path": "/sitecore/system/Settings/Services/API Keys/DockerStarter",
                "scope": "singleItem"
            },
            {
                "name": "core-language",
                "path": "/sitecore/system/Languages",
                "database": "core"
            }
        ]
    }
}
After implementing the above settings, run serialization again.
PowerShell
dotnet sitecore ser pullTesting Import
Test whether the serialization data created in the above steps can be imported into the new environment. Drop the XM1 environment, clean up the data, and start in a clean environment.
PowerShell
docker-compose down
cd docker
.\clean.ps1
cd ..
docker-compose up -d
After getting up and running, login on the command line. Since you have already logged in once during the above procedure, this time you can simply log in with the following command.
PowerShell
dotnet sitecore loginAnd next,
PowerShell
dotnet sitecore ser pushWe have confirmed that the site has been restored.

Summary
This time we have added a headless website to the Sitecore side. In the next article, we will review the steps to integrate this site with the Next.js project.