
Docker is a convenient mechanism for running Sitecore at hand, but when it comes to using containers for operations, it is more convenient to use Azure Kubernetes. Kubernetes is a convenient way to deploy containers.
So we will follow Sitecore's guide and review the steps for deployment on Kubernetes.
A related blog is written by Kamimura of SB Technology.
- Sitecore を AKS に展開する( Japanese blog )
In this article, we will deploy the XM Scaled (XM1) environment on Azure Kubernetes Service - AKS to set up the environment.
Prerequisite
The following environment is required for the client to run the program.
- Windows 10 1909 or new version
- Kubernetes 1.16x or new version
- No need to install Docker Desktop since it was already installed.
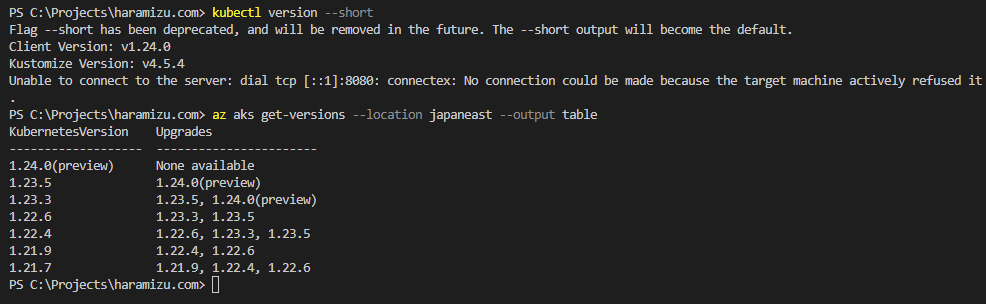
- kubectl version --short Version can be checked at
- Azure CLI
- Helm 3.0.x or new version
- Sitecore SXP 10.2.0 Container Deployment Package (Download from website)
If you want to install Helm, you can use Choco, which we often use on this blog, for easy installation.
PowerShell
choco install kubernetes-helm
Then check the version of Kubernetes that Azure supports. First, switch to a subscription to log in and work with the Azure CLI commands.
PowerShell
az login
az account list --output table
IsDefault, which is displayed on the rightmost side, is set to True at the top, but can be toggled by the following command.
PowerShell
az account set --subscription "YourSubscriptionName"
You have switched to another subscription. Find out what data centers are available for this subscription.
PowerShell
az account list-locations --output table
Most of them can be used. In this case, we will use japaneast.
PowerShell
az aks get-versions --location japaneast --output table
In this case, KubernetesVersion and the version at hand shows the situation is supported in preview.
Package Deployment
Download the sample files you will need to work with and prepare them at hand. Download the Container Deployment Package from the following page.
We will use k8s\ltsc2019\xm1 in the downloaded SitecoreContainerDeployment.10.2.0.006766.683.zip for this project. Copy this folder to c:\projects\aksxm1
Deployment of Certificate Files
This time, we will prepare and deploy a wildcard certificate as a certificate. We will place the certificate file under the secrets\tls of the above extracted folder. How to create the file is described in a previous blog post.
In this case, the following command was used.
PowerShell
cd C:\Projects\license
openssl pkcs12 -in sitecoredemo20220411.pfx -clcerts -nokeys -out C:\Projects\aksxm1\secrets\tls\global-cd\tls.crt
openssl pkcs12 -in sitecoredemo20220411.pfx -nocerts -nodes -out C:\Projects\aksxm1\secrets\tls\global-cd\tls.key
Copy the created files to `global-cm` and `global-id` to complete the work.
Summary
In this issue, we have proceeded to introduce the procedure, prepare the environment at hand, and prepare the files to do the work. Please set up the certificates according to your available environment. In the next article, we will introduce how to set up the prepared files.