
We've covered how to run Sitecore in Docker containers locally. However, these steps differ from those for deploying to cloud services. For actual operations, Sitecore is combined with Azure Kubernetes Service (AKS).
This tutorial is available in detail on the Microsoft Web site.
Open Azure Cloud Shell
This time we will use the Cloud Shell provided in the Azure portal as our working environment; to start the Cloud Shell, click on the leftmost icon in the top menu of the Azure portal.

When launched, a terminal will appear at the bottom of the window as shown below. If you are starting up for the first time, you may see a screen for specifying storage. Please follow the procedure on the screen, or if you are unsure, check the Internet for instructions.

This completes the preparation. In the case of bash, please refer to the MS tutorial or switch to PowerShell to follow this procedure.
Switching Subscription Accounts
To check which subscriptions to use, use the following command to see which subscriptions are available
PowerShell
Get-AzSubscriptionThey are listed as follows

Specify the subscription you wish to use.
PowerShell
Set-AzContext -SubscriptionId "yoursubscriptionid"
This completes the preparation.
Windows Container Deployment
We will be running a tutorial on deploying Windows containers, this time in the form of deploying an ASP.NET sample application.
Creating Resource Groups
The first step is to create a resource group.
PowerShell
New-AzResourceGroup -Name jpn-ShinchiDemo -Location japaneast
The portal shows that a resource group has been created.

Create an AKS cluster
To create an AKS cluster, it is necessary to create an SSH key pair using the ssh-keygen command. Detailed instructions are provided on the following page.
The following commands are actually executed.
PowerShell
ssh-keygen -m PEM -t rsa -b 4096
Then create an AKS cluster. The command will be the following one line, but please note the following
- Set the resource group name to the name created above.
- The cluster name can be specified by Name
- Set $Username and $Password to the values you want to set
PowerShell
$Username = Read-Host -Prompt 'username setting'
$Password = Read-Host -Prompt 'password setting' -AsSecureString
New-AzAksCluster -ResourceGroupName jpn-ShinchiDemo -Name myAKSCluster -NodeCount 2 -NetworkPlugin azure -NodeVmSetType VirtualMachineScaleSets -WindowsProfileAdminUserName $Username -WindowsProfileAdminUserPassword $Password
After a few moments, the deployment of the kubernates service is complete.


Creating a Windows Server Node Pool
When adding a node pool, a Linux type is created by default, so Windows must be selected in OsType. A sample command is shown below.
- Resource group name should be the name you have already created - Cluster name should be the name you have already created
PowerShell
New-AzAksNodePool -ResourceGroupName jpn-ShinchiDemo -ClusterName myAKSCluster -VmSetType VirtualMachineScaleSets -OsType Windows -Name npwinThe results of the execution are as follows

Connect to a cluster
To connect to the cluster, use the kubectl command. In executing this command, you will download your credentials and configure them for use. The command to do this is
- Resource group name should be the name you have already created
- The cluster name should be the name already created
PowerShell
Import-AzAksCredential -ResourceGroupName jpn-ShinchiDemo -Name myAKSClusterTo check the connection to the cluster, the following command will display the nodes.
PowerShell
kubectl get nodes
Deploying Applications
PowerShell
vi sample.yamlPaste the following code. vi will enter input mode when you type i, then paste to paste the code. You can also type : to execute the command, or w to save the file (keystrokes are :w + Enter, in that order). To exit, use :q to quit vi.
Plain Text
apiVersion: apps/v1
kind: Deployment
metadata:
  name: sample
  labels:
    app: sample
spec:
  replicas: 1
  template:
    metadata:
      name: sample
      labels:
        app: sample
    spec:
      nodeSelector:
        "kubernetes.io/os": windows
      containers:
      - name: sample
        image: mcr.microsoft.com/dotnet/framework/samples:aspnetapp
        resources:
          limits:
            cpu: 1
            memory: 800M
        ports:
          - containerPort: 80
  selector:
    matchLabels:
      app: sample
---
apiVersion: v1
kind: Service
metadata:
  name: sample
spec:
  type: LoadBalancer
  ports:
  - protocol: TCP
    port: 80
  selector:
    app: sample
This yaml file is in the form of an ASP.NET sample app container downloaded and configured with respect to network configuration. To apply it, you can run the following command
PowerShell
kubectl apply -f sample.yaml
Operation check
The following commands are used to check if the deployment has been done correctly.
PowerShell
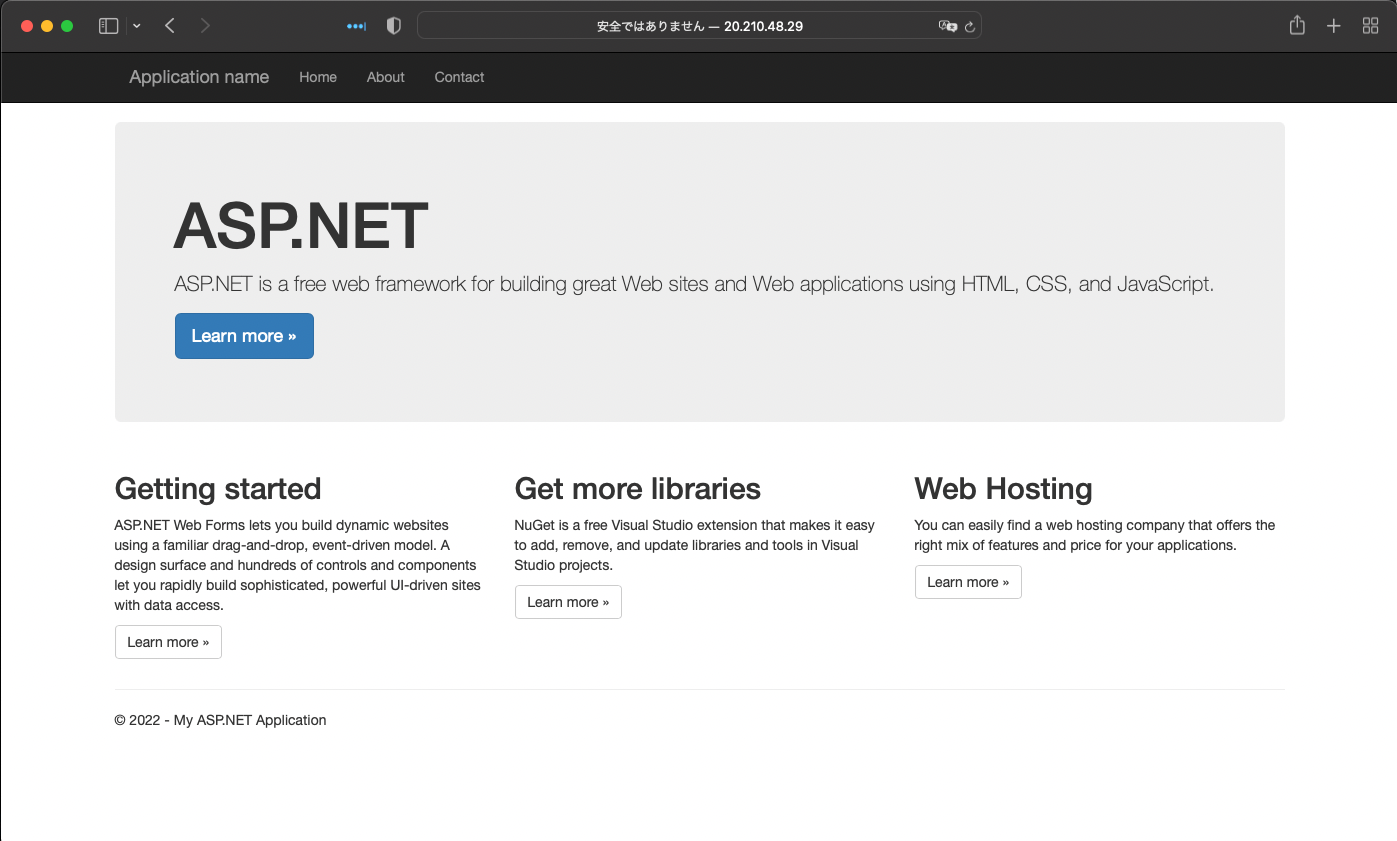
kubectl get service sample --watchThe IP address is displayed as shown below.

If you access this server via http, the page will appear as follows.
Summary
This time, we followed the tutorial through the basic steps to use AKS, and were able to deploy a Docker container and start it as a web server.