
Sitecore Content Hub offers Cognitive Service integration to automatically tag assets. Initially, tags are linked in English. This implementation is divided into two parts. The first part covers creating Azure resources, Content Hub actions, and triggers.
Sitecore Content Hub Taxonomy - Implementing Translation Integration for Automatic Tags - Part 1
Digital Asset ManagementPublished: 2021-01-18
Sitecore AI - Image Analysis
Image analysis is implemented in Sitecore Content Hub, but it is designed to work with the image analysis functionality provided by Microsoft Azure's Cognitive Service.
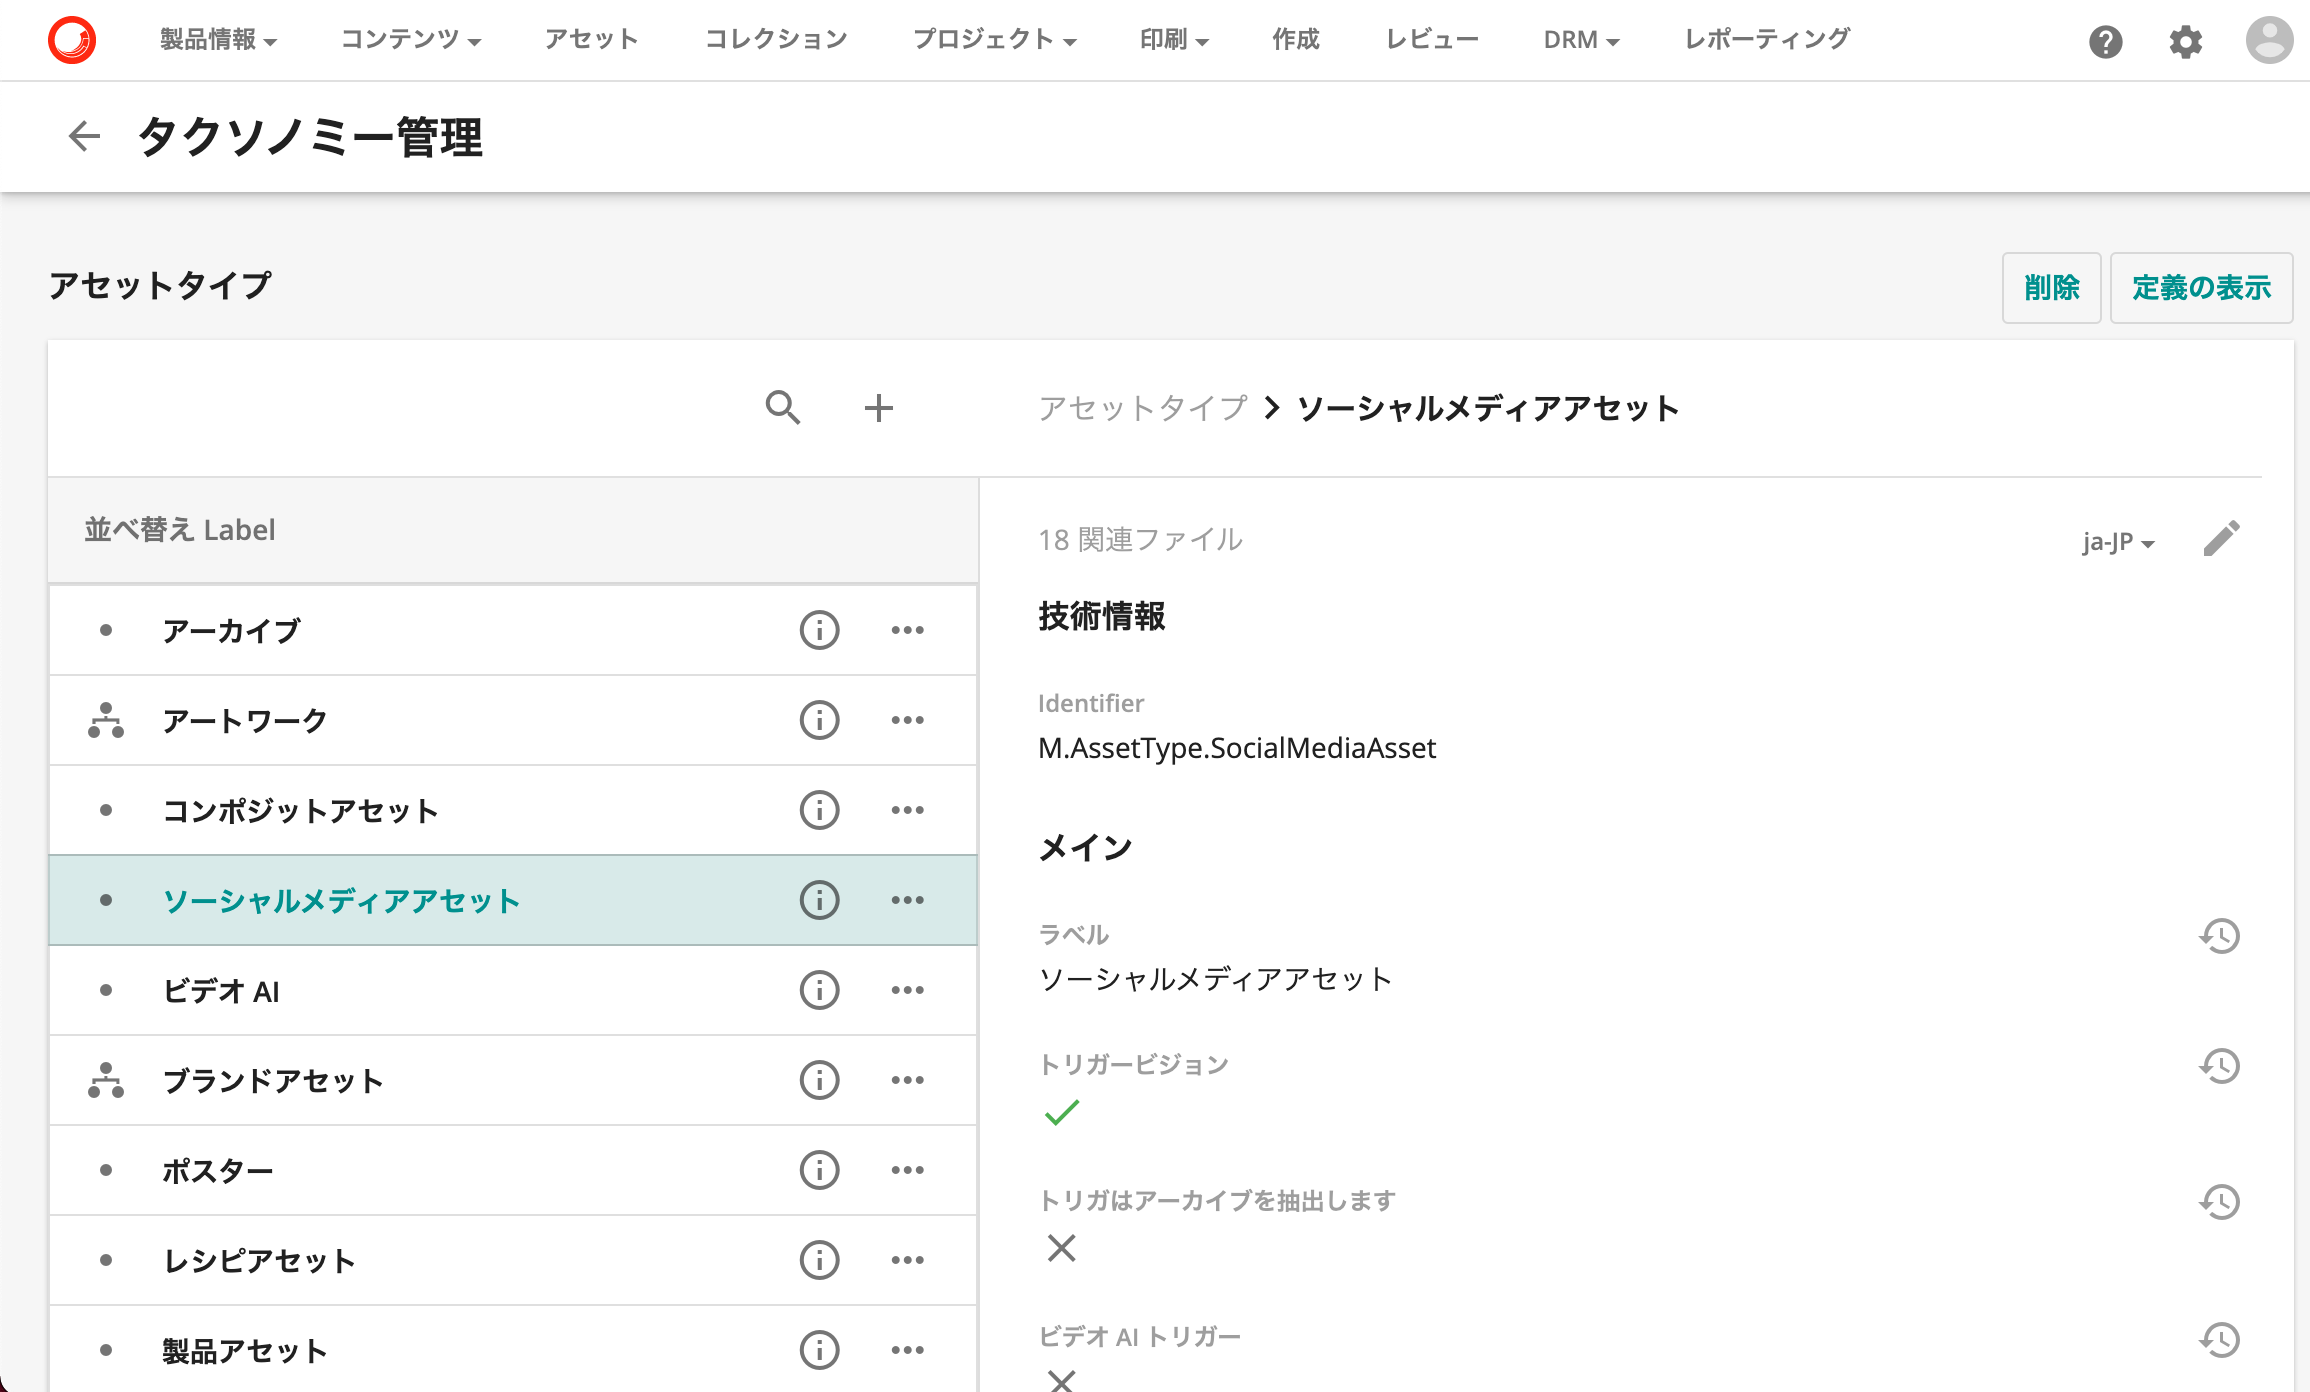
To use this feature, a standard function is implemented to automatically analyze and set the tagging when an asset type is specified. To check this setting, select "Taxonomy" - "M.AssetType" from the administration screen and select any asset type from the list of asset types. For the demo site, if you look at the Social Media Asset settings, you will see that the Trigger Vision item is checked.
Regarding the process of tag translation
When a new tag is generated, we will develop a process to retrieve the English word, translate it into Japanese using machine translation, and reflect the result in the Japanese resource of the corresponding tag. The development process uses a trigger to execute a pre-defined action when a new tag is generated, and the result is reflected in the Japanese resource of the tag.
For the external processing part, we will use Microsoft Azure. This is because the Sitecore Content Hub action provides a standard function to send messages to the Service Bus, and we will create a process in which the message is processed by the Logic App, translated, and reflected in the original data.
Although it is possible to develop scripts and process with the API, this form of customization is highly versatile, so we will introduce processing using the Logic App.
Processing in Microsoft Azure
This will be the first Logic App sample we create, so we will start by creating a resource group.
Creating Resource Groups
Go to the Microsoft Azure portal, select a resource group, and navigate to the Create screen.

This time we will create a resource group named contenthubdemo. The subscription is the free plan that comes with Visual Studio Enterprise. When the resource group is created, it will have empty resources as shown below.

Preparing the Service Bus
Creating a Service Bus
Prepare a Message Bus to handle messages provided by Sitecore Content Hub actions. In the new resource group created above, click the Add button.

You will be asked to select a new resource type, so type Service Bus in the search box to see the candidates.

After making a selection, the screen switches to a screen for creating a new Service Bus, as shown below.

Click Create to enter the namespace creation. The subscriptions and resource groups reflect what you are already working with, and the name, location, and price level of the namespace. For the price level, Standard must be selected.

After completing the entry of items, execute Confirm and Create, Create to complete the creation of the Service Bus.

Create Topic
Messages sent from Sitecore Content Hub actions are processed as topics, so we prepare the topics that will receive them.
Open the Service Bus you just created and open the topic in the entities listed in the menu. Since this is the first time the Service Bus has been created, there is no definition for the topic.

Click on the Add Topic item on the screen above to create a new topic. In this case, we will create it as m_trans.

The created topic will appear in the list.

Click on the name and you will see the following screen.

To add subscription settings, click Entity - Subscriptions in the left menu.

Subscriptions is left blank, so add a subscription by clicking on Subscriptions above No Results. The fields to be entered are: sitecore for the name, and the maximum number of subscriptions is set to 10 this time.

By clicking Create, you have completed the Service Bus configuration.
Adding Microsoft Translator
This time we will use Microsoft Translator as the translation process. It is possible to skip this step if you already have Microsoft Translator resources.
To process the translation, add the Microsoft Translator resource to the Resource group, just as you did with the Service Bus selection, click Add in the Resource group, and search for the Translator keyword.

Click on Translator to go to the resource description screen. Click on the Create button on this screen.

On the creation screen, you can select the region, name and price level of the resource. For demo purposes, Free is fine. Note that Free is limited to one per subscription. For the region, please select Global. For this reason, the following settings will be used for this project.

The process is now complete. The resource being created is in the form of two ready resources.

Creating Triggers and Actions
This section introduces the triggers that work with the Sitecore Content Hub. Please note that a package for triggers only is available at https://github.com/SitecoreJapan/ContentHub.Demo/tree/main/Packages. This package is TaxonomyAutoTranslateJA-346. zip is the target package. Below are the instructions for creating them manually.
Create Action
Create an action to connect to the Service Bus you have just prepared. To create an action, select Action from the administration screen.

Clicking on "New Action" on the Manage Actions page will take you to the Action Setup page.

To create an action, enter the following items
Column | Function | Example |
|---|---|---|
Name | Action Name | Demo - AutoTag |
Label | Action Overview | |
Type | Select action | Azure Service Bus |
Connection String | Service Bus URL | |
Send type | Topic or Que | Topic |
Send to | Topic name | m_trans |
For the connection string, enter the URL of the Service Bus created in Azure. This URL is for demonstration purposes only, so follow the steps below to obtain it.
- Access the Service Bus configuration screen
- Select Settings Shared Access Policy
- Select a policy that appears in the list
- Press the clipboard button for the primary connection string from among the items displayed.
- Paste into the connection string of the action
When all of the above items have been entered, perform a connection test. If the connection is successful, the initial setup is complete.

Save the file here and prepare the necessary items separately.
Get Token
This time, the Logic App needs to be accessed via a web service in order to perform the processing in the Logic App. In this case, a token is required. The procedure for creating a token is as follows.
- Open the user in the admin panel.
- Create a new user (in this case SitecoreDemo)
- Set permissions
- Obtain user tokens

Customize Actions
Ideally, tokens and server names should be managed separately in actual operation, but in this case we will use an action to include server information and tokens in the topics sent to the Logic App.
Add a header to add two elements.
- host_header - FQDN of the instance you are using
- token - Input the token obtained above.
The reference screen with the above information set up is shown below.

The Sitecore Content Hub action is now defined.
Trigger settings
Select Triggers from the admin screen and create a new trigger. The screen will look like this

basis
Each setting item is configured as follows.
Column | Role | Example |
|---|---|---|
Name | Name of Trigger | Demo - AutoTag |
Overview | Overview of Trigger | |
Objective | Entity Processing | Entity Change |
Exe type | Select Execution Method | In the background |
Conditions
Next, set the conditions. In this case, the trigger is when a tag is automatically generated, so the following settings are used.
- Click Add Definition
- M.Tag Select
- Click Conditions
- Select AutoCreated
- Select current value
- Select equal
- Click the button on the right to enable
Action
On the Specify Action screen, select Demo - AutoTag. After completing the above settings, save and enable the trigger, as it is possible to enable triggers at that time.

Summary
In this first part of the series, we have completed the creation of the Microsoft Azure resource group, preparation of resources to be used in the Logic App, and preparation of the Sitecore Content Hub side. In the next article, we will implement the process in the Logic App.