
In this article, we'll explore integrating Figma, a free browser-based design tool, with Sitecore Headless. We'll create basic components in Figma and demonstrate how to fetch data via GraphQL and reflect it in the design.
- デザインコラボツール「Figma」日本語版リリースへ 日本法人設立 ( Japanese )
Create a Figma account
Figma's official website is as follows. Please access the site at .com, as a separate site has been set up for .jp.

There is a Sign up button in the upper right corner, but this time open the Pricing page to select a free plan. The pricing list shows a plan called Starter, and you can proceed by clicking the Choose Starter button.

You will first be asked to register your e-mail address and password to log in, followed by confirmation of your name and job title. You will also be asked to decide whether or not you would like to join the mailing list, and then click on the Create account button.
A few moments after pressing the button, you will receive an email to verify that the address is correct. Click on the URL in the email to complete your account creation.

Creating Components with Figma
We will create a component in Figma for this verification. Create a new design file by clicking `New design file` in the admin panel. This time, do not change the image, but place two text lines to make it look like it.

Install the Plug-in
This time, we will use Data Sync as a plugin that can read JSON data from the server. To install, access the following page and click the "Install" button.

If Data Sync appears in the Plug-in list from the menu, the plug-in installation is complete.

Verified on Sitecore's administration screen
You may safely skip this step and proceed to the next Postman step. What we are checking here is that you are able to retrieve the data using the tools provided on the Sitecore administration page. If you do not have a headless module or API key ready, you will not be able to proceed with this step. Please refer to the following page for instructions on how to set this up.
Assuming that the environment is ready, add `/sitecore/api/graph/edge/ui` to the server URL to access the server. The access will bring you to the administration page where you can check the results using GraphQL.

The HTTP Headers field in the lower left corner should contain the API key to access the site.
JSON
{
  "sc_apikey": "your api key"
}
Then, in the upper left corner, where you enter GraphQL, enter the following code. Note that you may need to change the path, item name, or field name depending on your environment.
JSON
query {
  item(path: "/sitecore/content/sitecoredemo-jp/home", language: "en") {
    ... on Home {
      pageTitle {
        value
      }
    }
    field(name: "pageTitle") {
      ... on TextField {
        value
      }
    }
  }
}
After setting up and executing the above code, the following Json was returned
JSON
{
  "data": {
    "item": {
      "pageTitle": {
        "value": "Home Sample Update 1 "
      },
      "field": {
        "value": "Home Sample Update 1 "
      }
    }
  }
}
Browsing to the target item in the content editor confirms that the page title has been retrieved correctly.

Verified by Postman
Now we will use Postman to access the data to see if we can retrieve it from another environment. First, add a new configuration, setting the method to `POST` and the URL to the GraphQL endpoint, which will be the name of the server we just used, removing the /ui from the admin page. The screen that has progressed so far will look like this

For Body, set the same query statement as before, specifying the GraphQL value.
JSON
query {
  item(path: "/sitecore/content/sitecoredemo-jp/home", language: "en") {
    ... on Home {
      pageTitle {
        value
      }
    }
    field(name: "pageTitle") {
      ... on TextField {
        value
      }
    }
  }
}
If the same data is displayed as a result of the execution, the situation is that it is possible to retrieve Json data by external access.

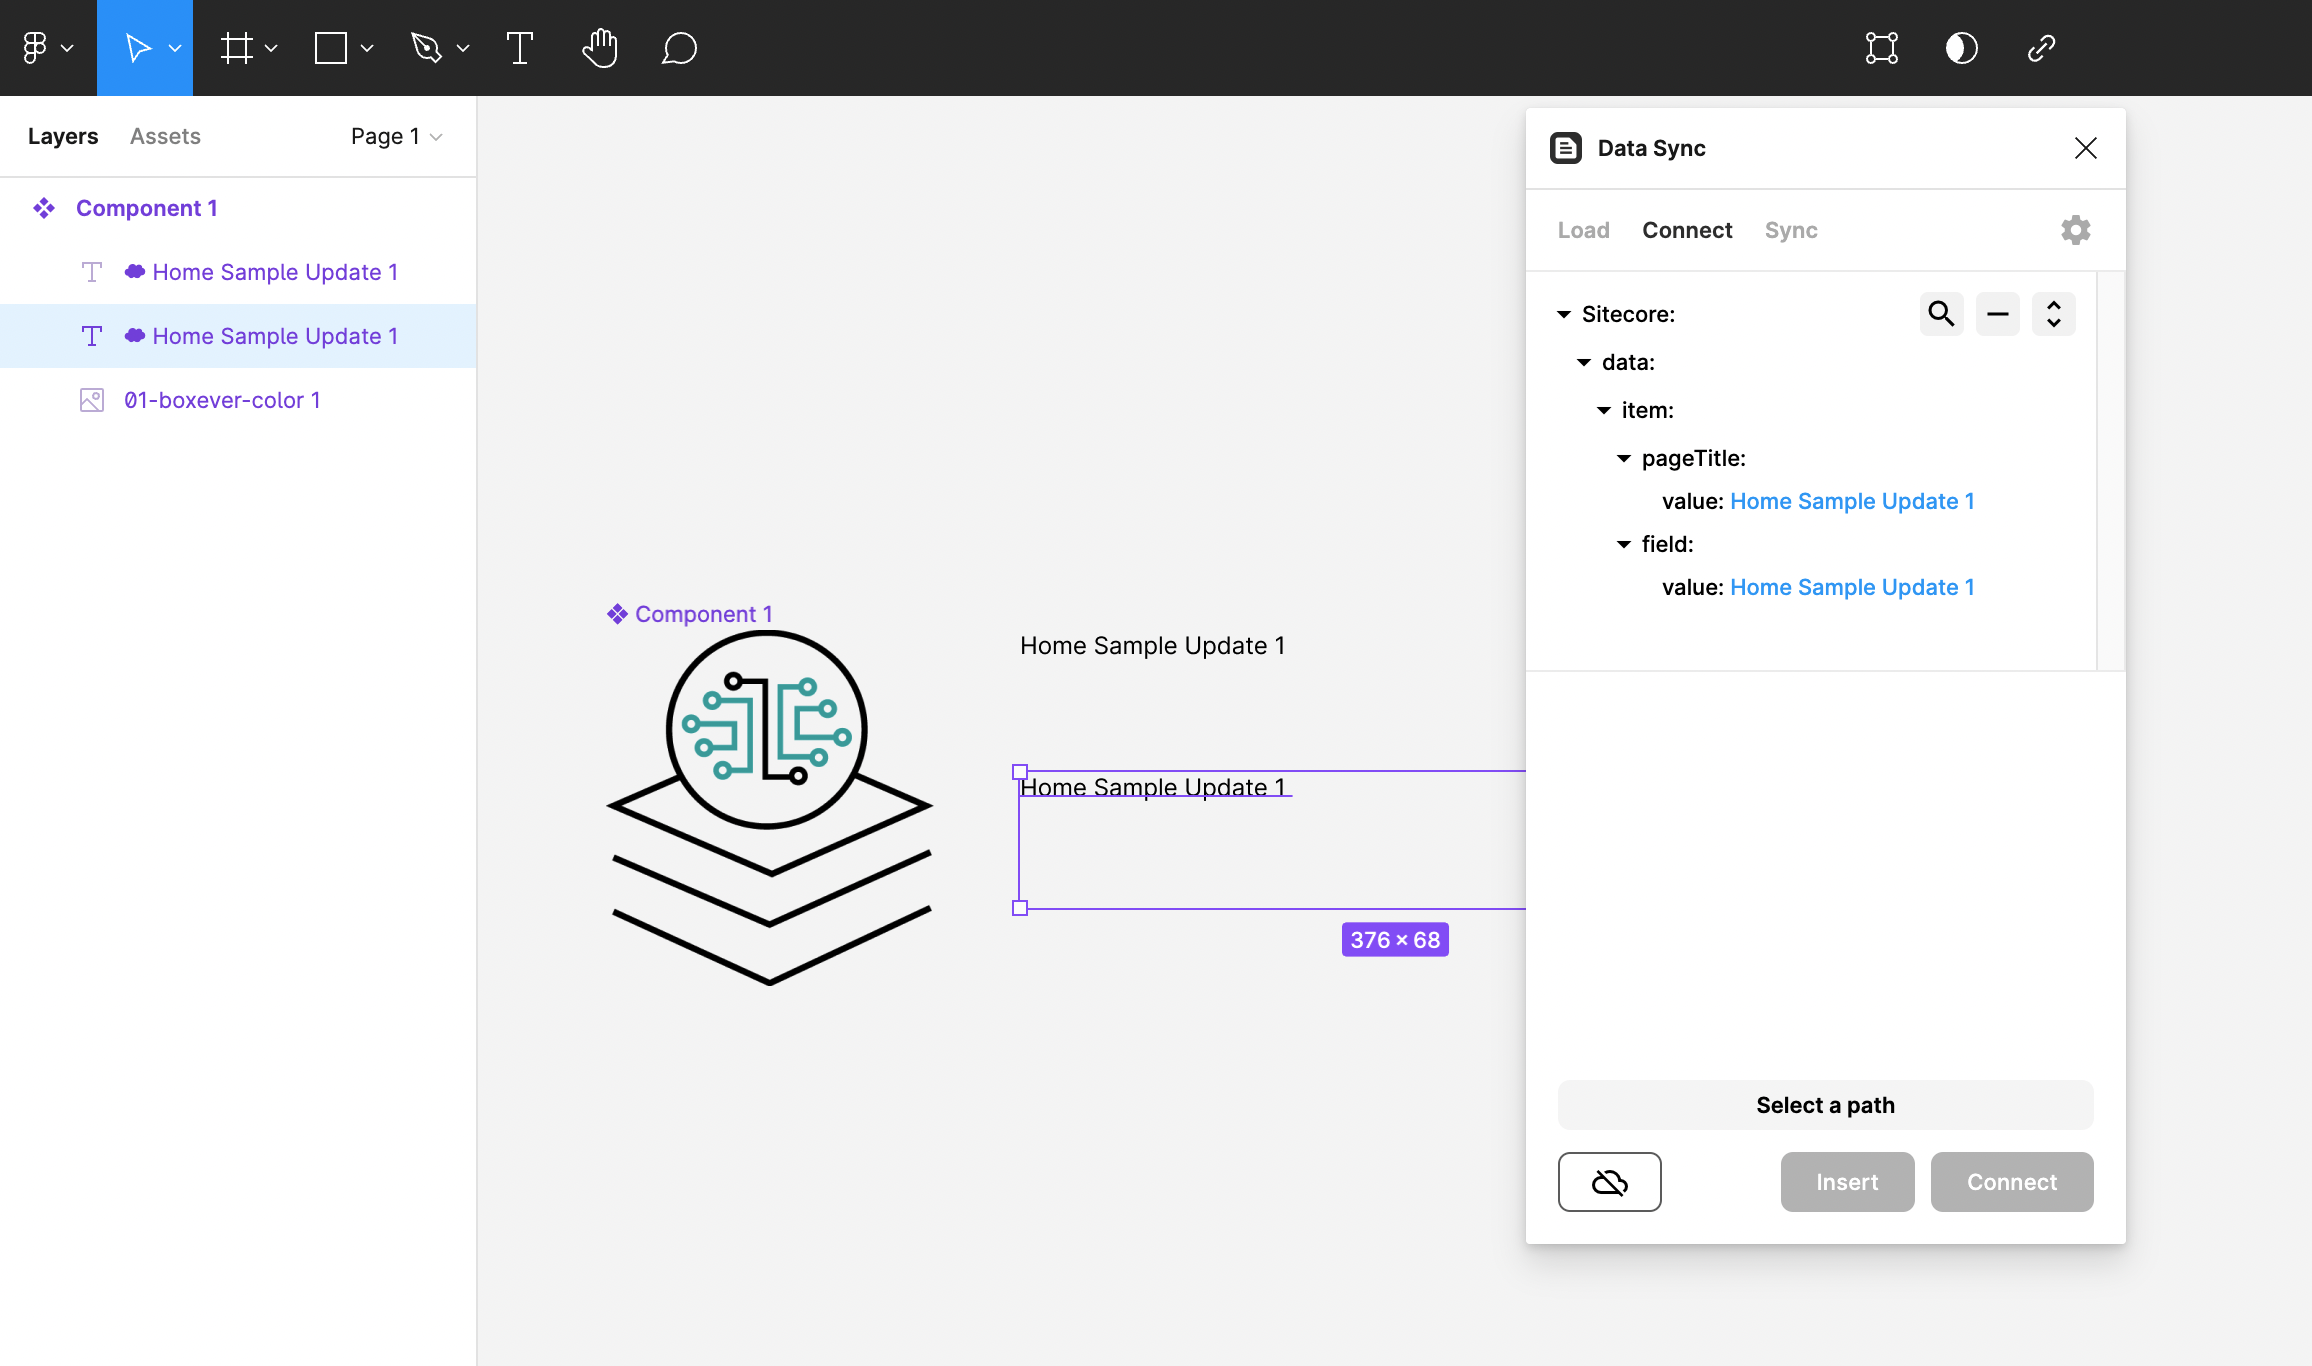
Assigning Json data in Figma
Now return again to Figma. Selecting the plugin Data Sync from the menu screen displays a dialog box. This time, in the Load section, enter the JSON data obtained by Postman.

Load will cause content elements from the Json data to be displayed in a dialog.

Each value is assigned to an element of the component.

JSON data assignment is now complete.
Read Sitecore data from Figma
Next, we want to retrieve data from Sitecore, so go to the Load screen, select the New menu item, and enter the server endpoint. For the Query, double quotation marks will cause an error, so add backslashes and no newlines. The following is the reference code (modify the API key, Path, etc. as necessary).
JSON
{
  "headers":{
      "sc_apikey": "{A8BB7124-A3DD-4CD2-AF81-77A9A3E44227}"
    },
  "query":{
      "query": "query { item(path: \"/sitecore/content/sitecoredemo-jp/Home\", language: \"en\") { ... on Home { pageTitle { value } } field(name: \"pageTitle\") { ... on TextField { value } } } }"
   }
}
After a few moments of clicking the Load button, the item is ready to be loaded and the data of the item can be assigned.
Summary
If headless JSON data can be retrieved, it will be easier to use and deploy content in another tool such as Figma. This would make it possible to use Figma to create a design for a site and then work with the actual data in the part of the site managed by Sitecore.