
Until now, Sitecore's editing environment utilized two tools: the Content Editor for an overall view and the Experience Editor for WYSIWYG editing. The new tool we're introducing, Sitecore Horizon, combines the best features of both.
Prerequisite.
This time, we will proceed with the installation in the following environment.
- Sitecore Experience Manager 10.2
- Sitecore Horizon 10.2
The domain should be assigned the same subdomain as the Sitecore CM server and Identity Server. This is because of the requirement regarding SameSite cookies. An example is as follows
- Sitecore CM: https://cm.mycompany.com
- Sitecore identity: https://si.mycompany.com
- Horizon: https://horizon.mycompany.com
Preparation before installation
Horizon requires the WebSocket Protocol for IIS. For this reason, you must add the feature from the Server Manager. This functionality is provided as an IIS feature, so please configure WebSocket as it appears in the list of IIS configuration items.

Sitecore Horizon also requires the following runtimes to be installed
Install
First, download the module from the following Web site
In this case, the following file will be used since it is applied to a virtual machine.
- Sitecore Horizon for On Premises deployment
Extract the downloaded zip file to C:\projects\horizon

We will edit the InstallHorizon.ps1 file found after the deployment. The configuration items are as follows
Parameter | Value |
|---|---|
horizonInstanceName | Set the name of the instance |
sitecoreCmInstanceName | CM Server instance name |
sitecoreAdminPassword | Admin password |
identityServerPoolName | ID Server application pool name |
licensePath | License file path |
enableContentHub | ture when connecting to Content Hub. |
enableSXA | true if SXA is used |
[ValidateSet("XP", "XM")] | Leave either XP or XM |
If the configuration is complete, it will take the form of executing PowerShell. At this time, the script may not be digitally signed and cannot be executed in some environments. Please execute the following command to temporarily remove it.
PowerShell
Set-ExecutionPolicy -Scope CurrentUser -ExecutionPolicy Undefined -ForceYou will now be able to run it. Please execute the following command.
PowerShell
.\InstallHorizon.ps1
Even if warnings appear along the way, click R to proceed.

Operation check
After installation, log in to the Sitecore administration page and you will see the Horizon icon added.

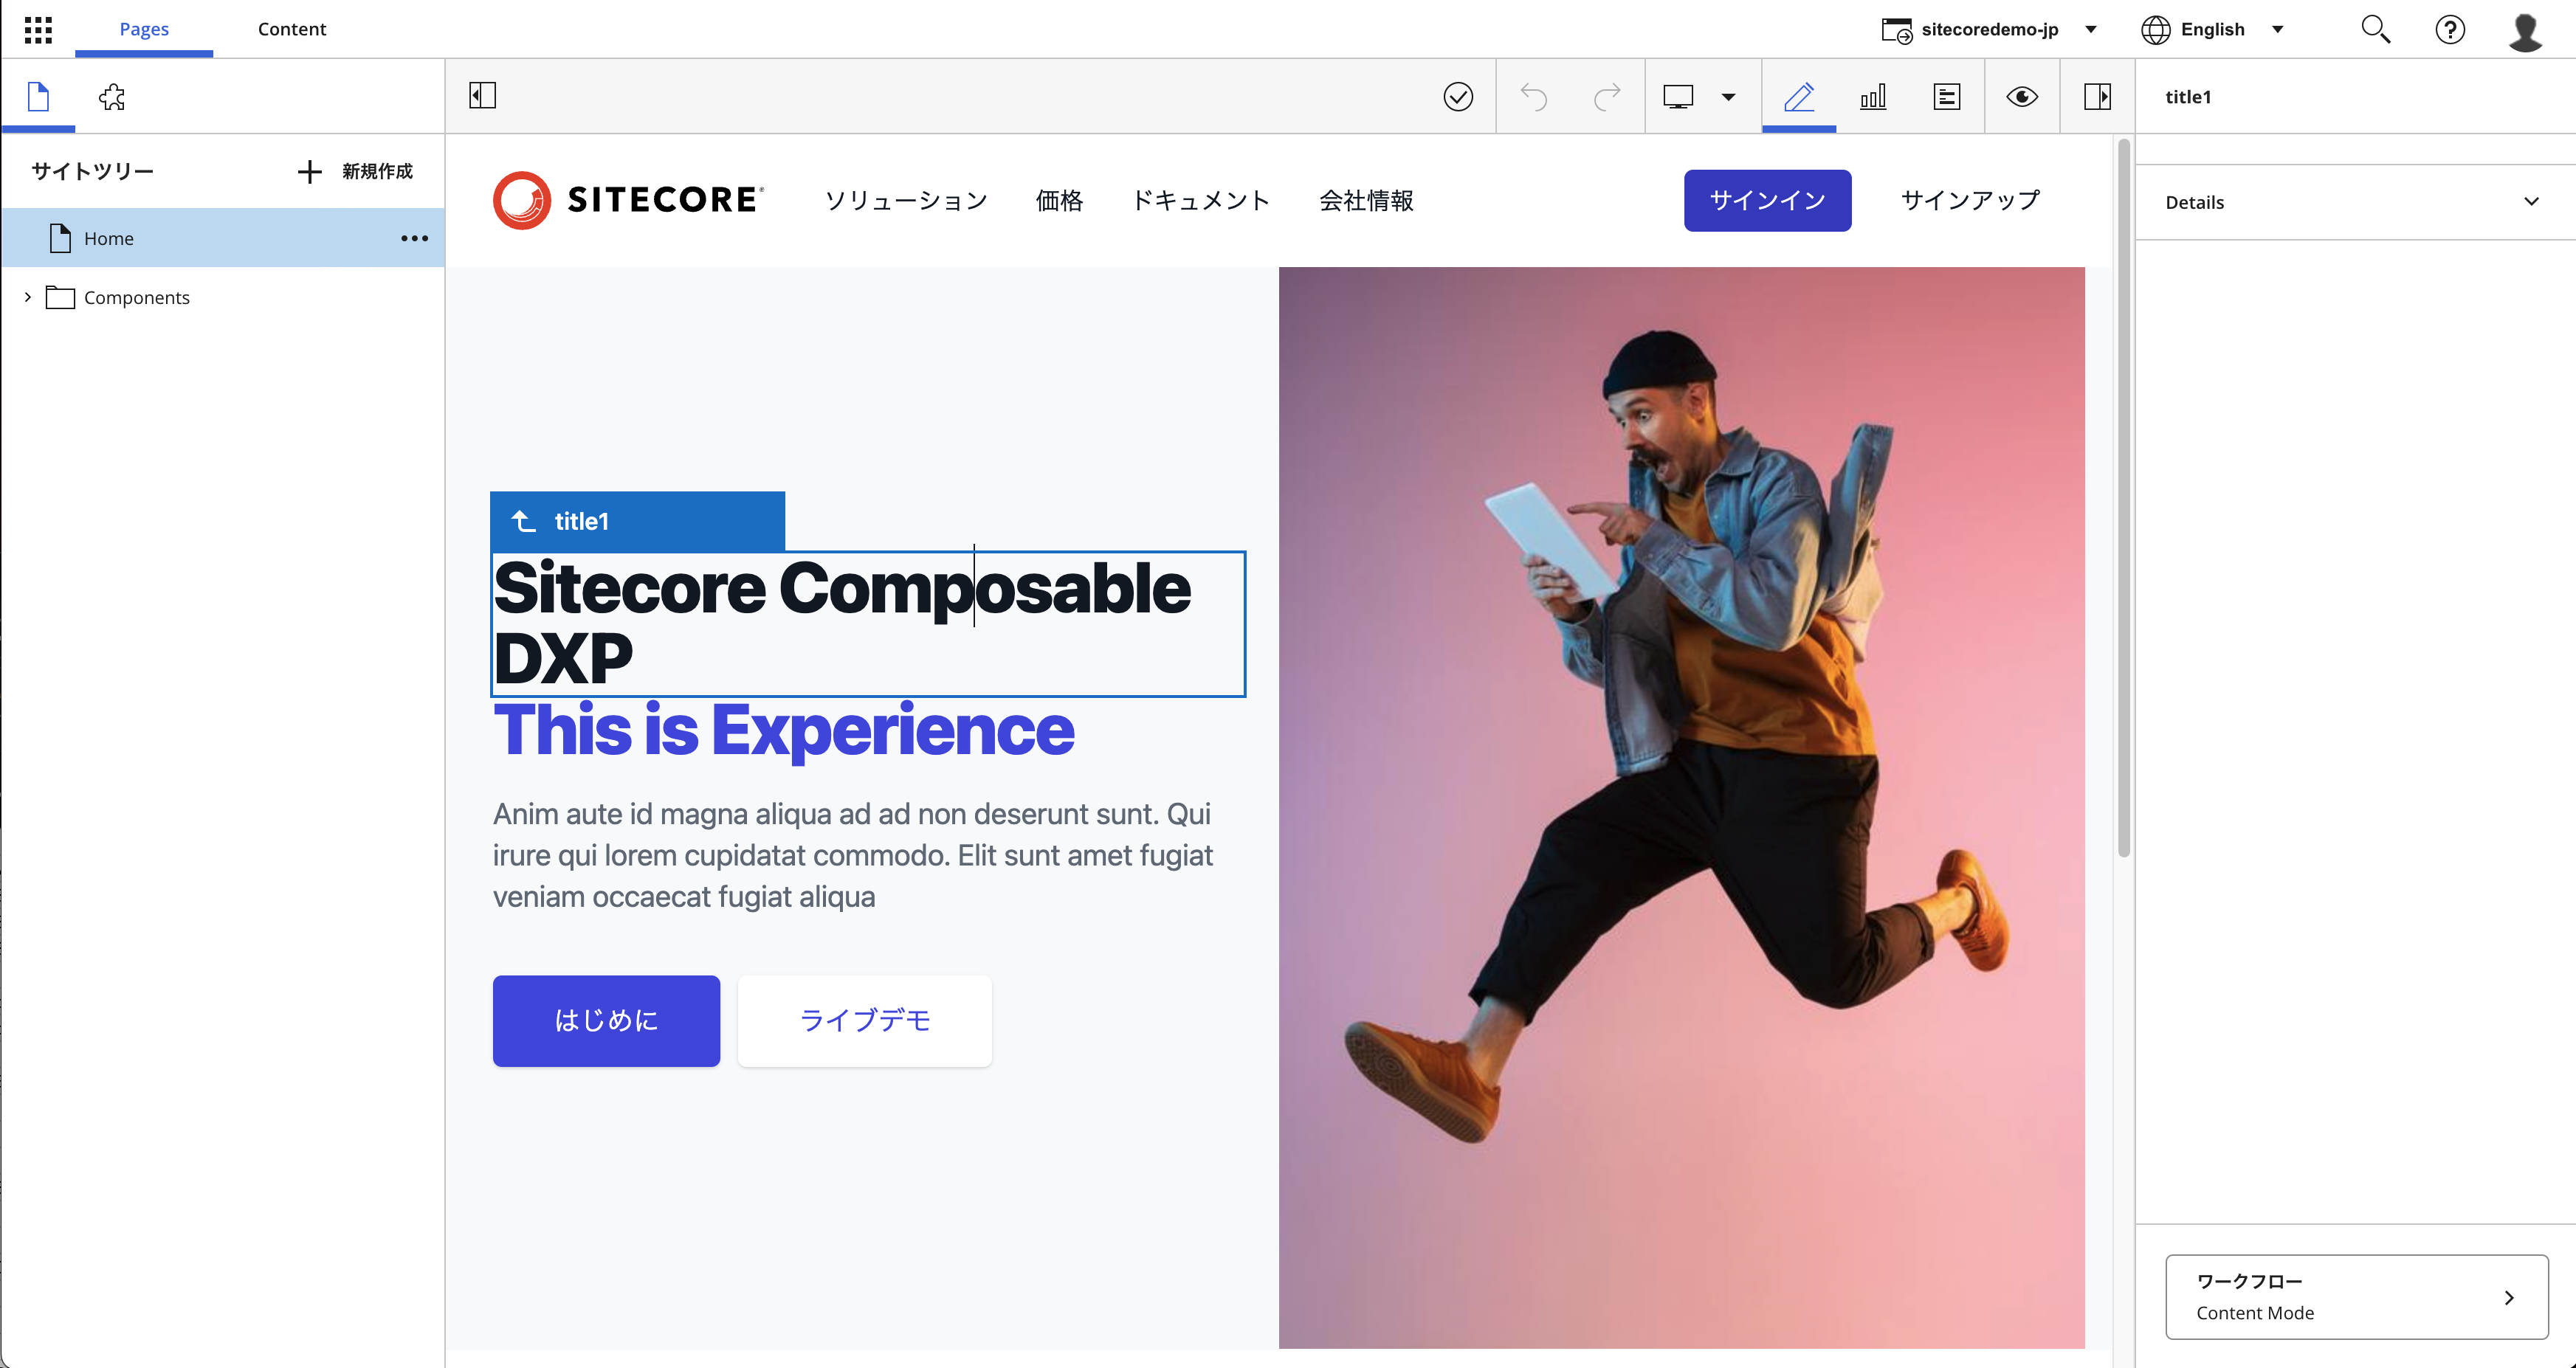
When Horizon is launched, the following administration screen appears

On the left side, the contents tree can be displayed by page or by content. Actions are also displayed on the right side, and editing can be done in the center area. It also provides preview functions and other features. We would like to prepare a separate introduction on how to use it.
Additional settings
Japanese resource for UI
The administration screen is in English, but you can change it by switching the following file to the Japanese resource.
- \sitecore\Sitecore.Horizon.Client\Client\dist\assets\i18n\en.json
The administration screen with Japanese resources applied will look like the following.
If you are working with Sitecore Content Hub
We will be working with Sitecore Content Hub on the new hostname. This requires additional CORS configuration.
- Open Settings
- Select PortalConfiguration - CORSConfigration
- Add an instance of Horizon Editor running
- Save.
The integration with Sitecore Content Hub is now complete.

Summary
In this article, we have introduced the installation procedure for Sitecore Horizon, a new editing tool for Sitecore. It is a good combination of a content editor and an experience editor, which can also reduce the number of screen transitions.