
In the previous article, I deployed a Next.js sample to Sitecore and integrated Vercel for delivery. This time, to facilitate easier testing and verification, we'll introduce the steps to separate production and staging environments and test locally.
Domain Settings
For this sample, we would like to set up the domain as follows
- sitecoredemo.jp Website
- www.sitecoredemo.jp Redirect to sitecoredemo.jp
- staging.sitecoredemo.jp As a verification of the operating environment
The above settings can be made by going to the Vercel admin page and adding Settings - Domains. The following is a screen shot of the above settings completed (Note that you will need to work on CNAME for DNS. (Note that you will need to work on the DNS CNAME, which will appear separately on the screen, so please refer to it to change it).

Publish content
Items imported into Sitecore are still only deployed in the Master database. We will first make these items available in the Web database.
For reference, when you switch to the web database, you will see that there are no items yet as shown below (the lower right corner of the screen is web).

As for the imported data, it is contained in the workflow JSS Deveploment Workflow. When you open the workbox and open the target workflow, you will see multiple items expanded as shown below.

Change the target item from Imported Data to Content by clicking the To Content Mode (All) button. The item will then be moved into the Content Mode workflow as shown below.

Clicking the Publish (All) button on this screen completes the workflow. Then go to the content editor, select the item /sitecore/content/sitecoredemo-jp/home, and select Publish Site from the Publish menu to execute the publishing process.

After the above steps are completed, the item can now be viewed by switching to the Web database as shown below.

Change settings to public server
In this case, XM1 is installed on a server, so the edit server and the distribution server are separate. The following procedure will be used to change the settings.
- Copy the file sitecoredemo-jp.config located in App_Config\Include\zzz on the edit server to the same folder on the edit server.
- Change database to web in the sites configuration.
XML
<sites>
    <!--
    JSS Site Registration
    This configures the site with Sitecore - i.e. host headers, item paths.
    If your JSS app lives within an existing Sitecore site, this may not be necessary.

    IMPORTANT: JSS sites ship in 'live mode', which makes development and testing easy,
    but disables workflow and publishing. Before going to production, change the `database`
    below to `web` instead of `master`.
    -->
    <site patch:before="site[@name='website']"
        inherits="website"
        name="sitecoredemo-jp"
        hostName="sitecoredemo.jp"
        rootPath="/sitecore/content/sitecoredemo-jp"
        startItem="/home"
        database="web" />
</sites>
The delivery server will now be able to reference the content published in the Web database.
Local testing
Change the environment so that Sitecore can connect to and run in the local environment. This can be done by adding values to the .env file.
Plain Text
PUBLIC_URL=http://localhost:3000
JSS_EDITING_SECRET=Describe the JSS EDIT KEY you are using
SITECORE_API_KEY=Set the API key
SITECORE_API_HOST=Enter the hostname of the editing server (be careful not to put a / at the end)
You can now retrieve the content set up on the edit server and display the page. For the sake of clarity, we will edit the content on the edit server.

With the file saved, start it locally.
PowerShell
jss startIf you access http://localhost:3000 in this state, you will see that the page is retrieving data from the CMS and displaying the page as shown below.

Let's run Build just to be sure.
PowerShell
jss buildYou can now verify that the HTML file is generated at .next/server/pages/en.html. If you search for the edit server in the code, you have confirmed that the build is a successful form.
Then test against the delivery server. Before that, to make it easier to check the contents of the Web database, the following procedure is used to modify the data directly in the Web database with the content editor.
- Accessing the Desktop
- Switch the database view to Web in the lower right corner.
- Click on the Sitecore logo in the lower left corner to open the content editor
- Open Item of /sitecore/content/sitecoredemo-jp/home/Page Components/home-jss-main-ContentBlock-1
- Change the title

Then, open the .env file and change the value of SITECORE_API_HOST to the URL of the server you are publishing. After the change is complete, rewrite the
PowerShell
jss startStart locally with If you see different content than before as shown below, you can confirm that you are accessing the content of the public server that is referenced in the web database.

To be sure, run the build and make sure there are no errors.
PowerShell
jss buildOnce you are in error-free form, proceed to the next step.
Reflected in the Vercel environment
From here, we will proceed to the Vercel settings. We will change the settings listed under Settings - Environment Variables in this project.
Previously, SITECORE_API_HOST was listed as the hostname of the CM server. Change this to the server for public use. Update the hostmain item that has already been registered, with only the Preview checkbox as the Environment.

Then specify the same SITECORE_API_HOST key, but check and add Production only.

The result is two SITECORE_API_HOST, but with separate server references for Production and Preview.

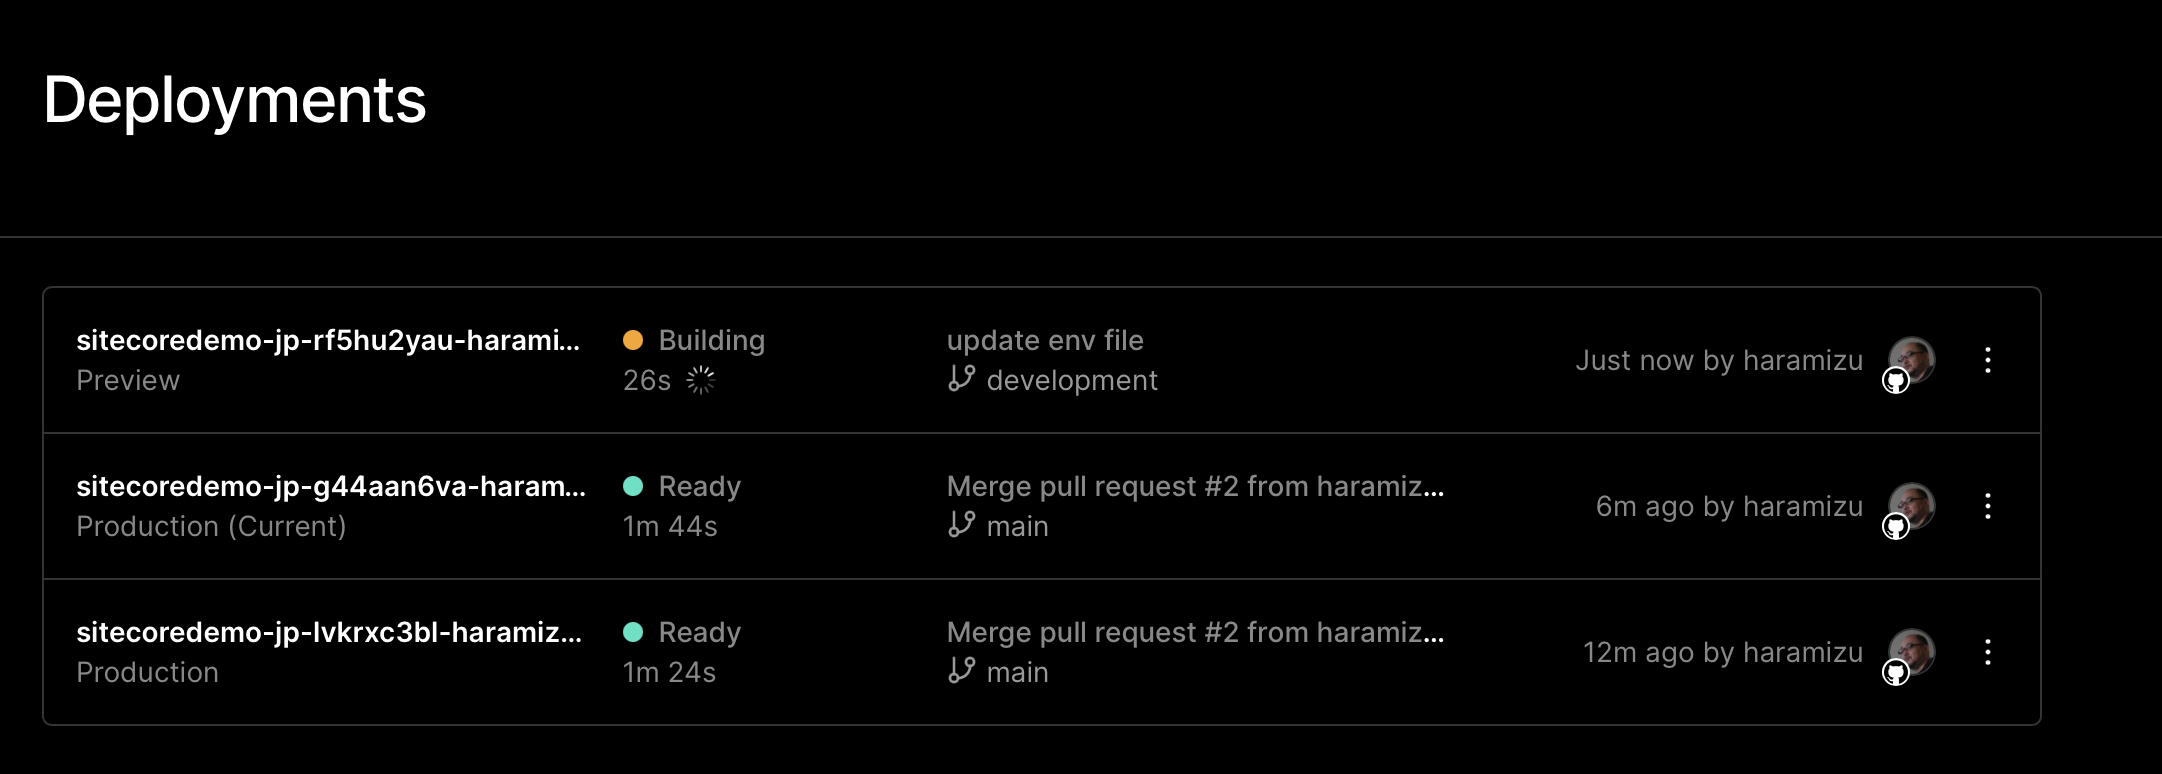
If you go to the Deployments menu of the project, you will see the results of the previous deployment. Run Redepoy to see if it works with the changed configuration.

Once the deployment is complete, the site is updated as shown below, confirming that the site was built using data from the web database.

Then go to GitHub and create a development branch.

To apply the development branch to Vercel's domain, go to Settings - Domains in Vercel and set the Git Branch to the branch you just created.

You are now set up. Any changes made to the development branch will automatically cause a build to be performed.
After the Build is completed, the following page will appear when you access the site.

Now the environment is ready.
Summary
In this article, we presented procedures related to the configuration of XM's delivery server and the integration of Vercel and GitHub. As a result, the pages published in the CMS are deployed to the production environment (referencing the web database), and when developing on the fly, we can refer to the Sitecore content, deploy to the development branch, and test. Once this is done, we can create the components on our end and edit the pages in Sitecore CMS.