
In the previous topic, we explored Sitecore permissions by leveraging Access Viewer, creating two permissions sets with different rights, and assigning them to users. This time, we'll delve into the tips for combining roles to set permissions effectively.
Setting inaccessible permissions
In the previous article, the roles were set to have no access privileges. Check out the following two roles.


The permissions of users in these two roles are as follows
This allows us to add areas that are inaccessible, which can be managed by roles, but how do we add areas that are accessible? This is what we will introduce in this issue.
Understanding Everyone's Authority
In understanding roles, it is necessary to understand the role Everyone. This role is granted to all users by default and is not visible in the role list. In the following image, you can see that a search for Everyone in the Role Manager does not show it.

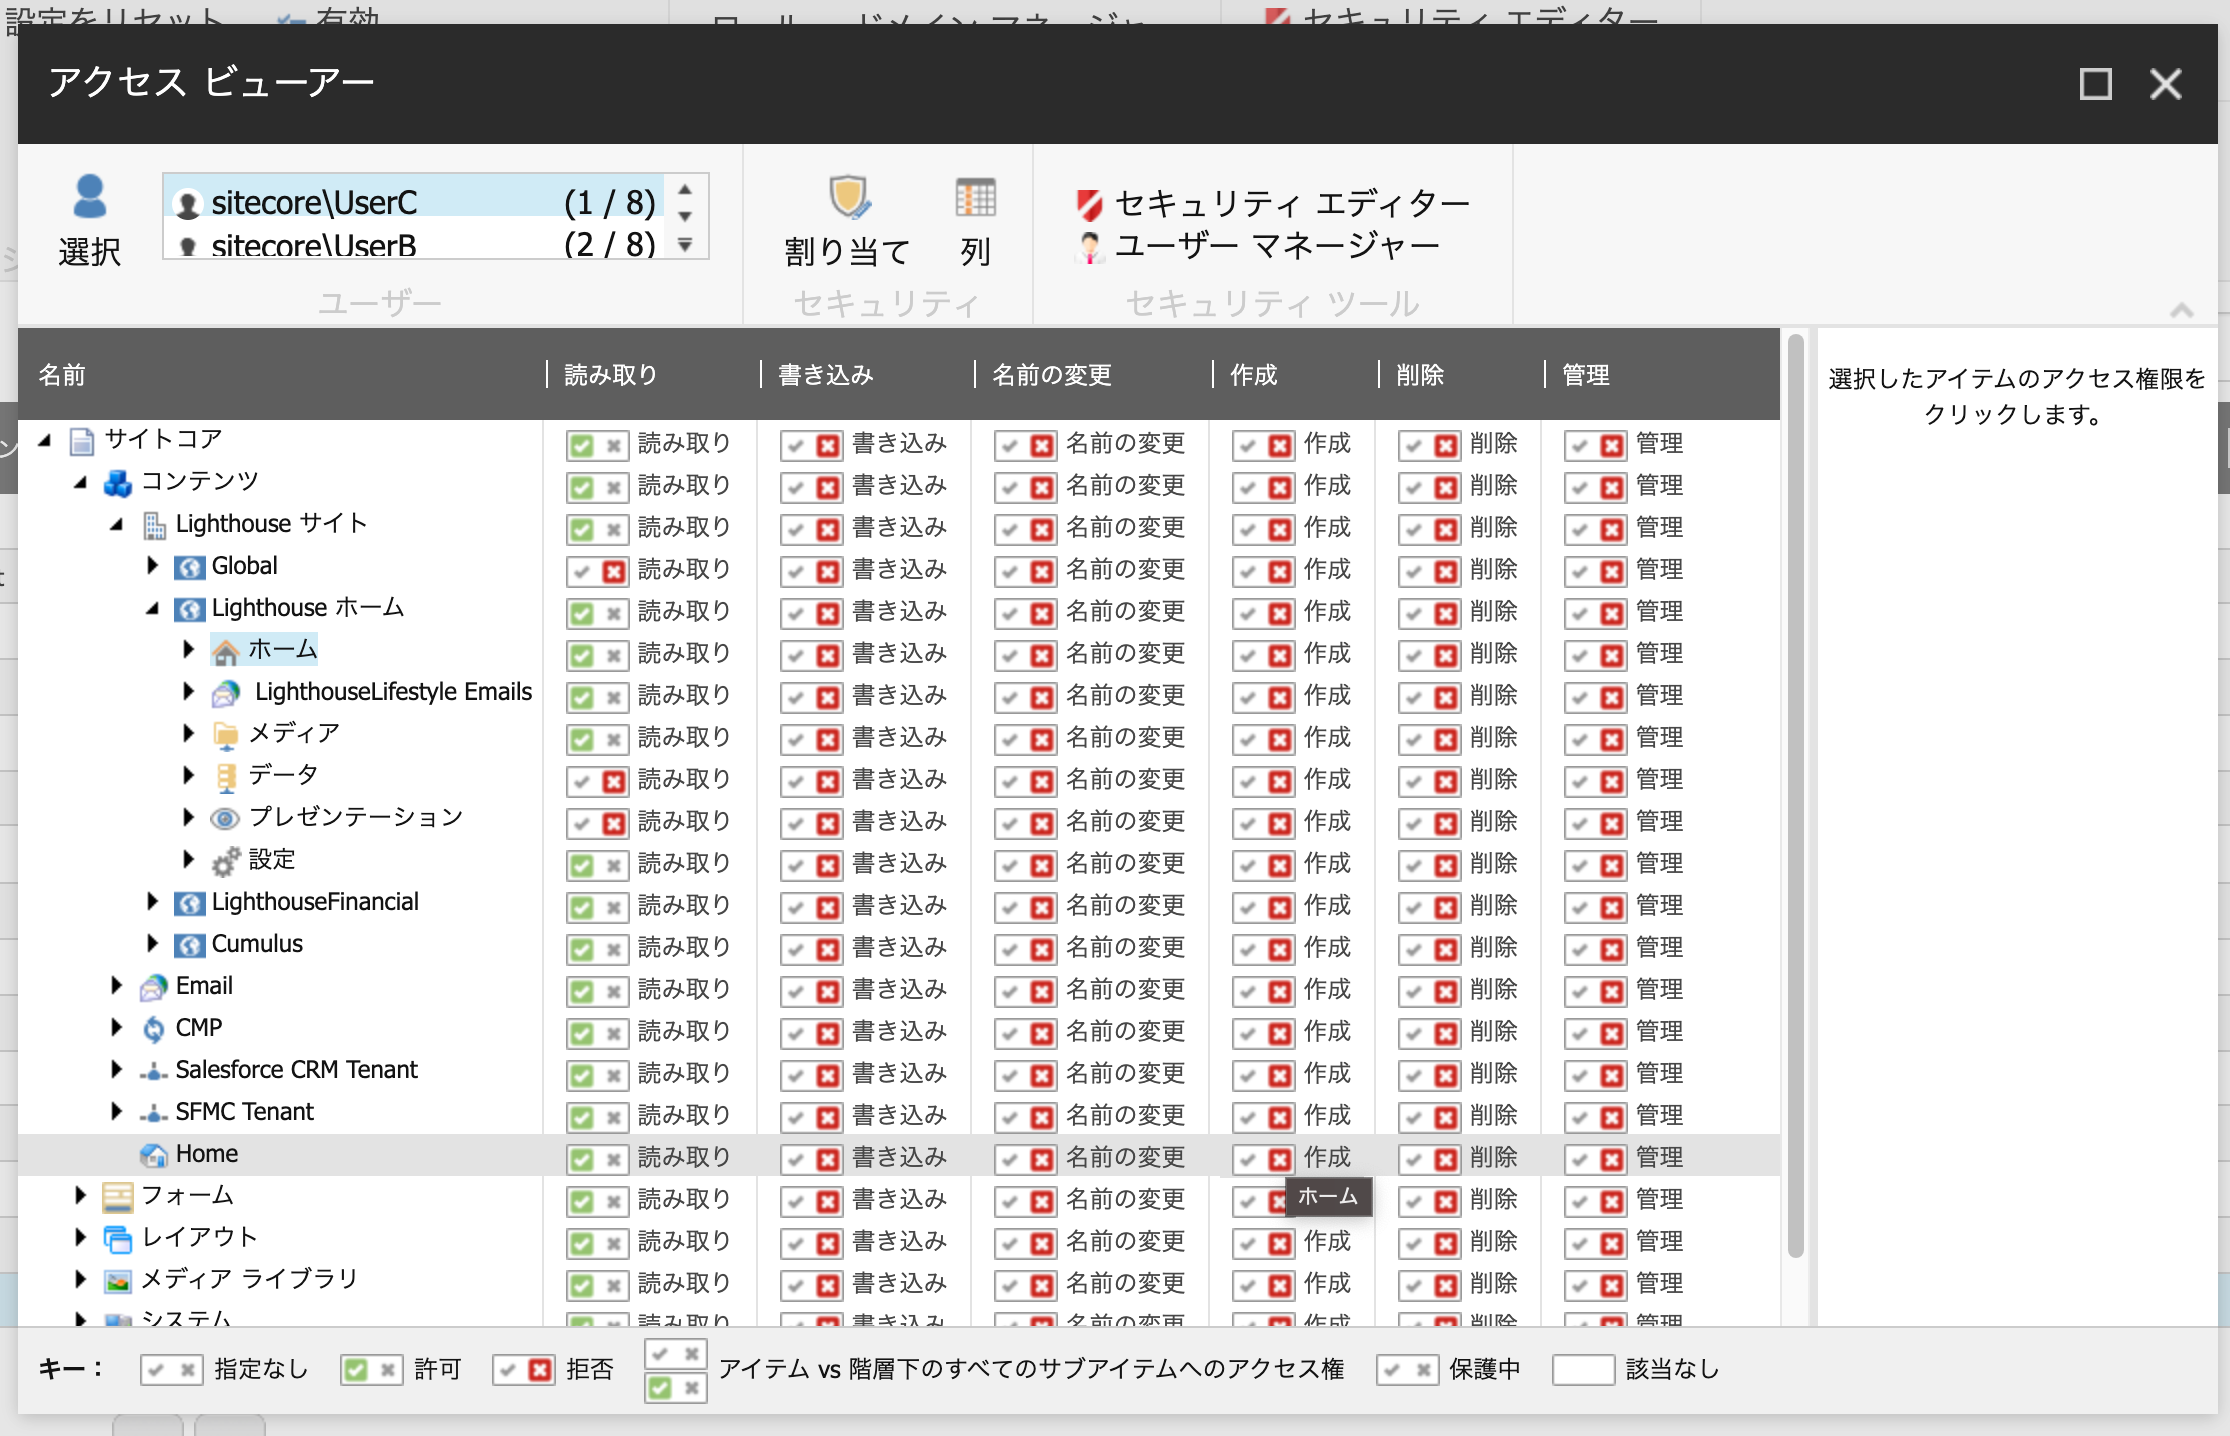
Open the Access Viewer, click the Select button, and search for Everyone to see Everyone's permissions for the domain.

All Sitecore domain users will have read permission set for all content. Since read permissions are attached to all content, specifying invisible areas, as in the previous article, is a combination of the two, and specifying multiple roles will result in an increase in the number of invisible areas.
Role management to attach read permissions
Edit Everyone role
Now, to manage the permissions to grant read permissions to the tree, this default read setting will get in the way. In this case, since we will be configuring the content tree, we will first remove the permissions held by Everyone from the Content section above the Home item. The procedure is as follows
- Select sitecore\everyone
- Open the Security Editor
- Select the top item of content in the tree
- Unprotecting an item
- Select Delete Inheritance from the Security Presets in the menu
Once the above settings are completed, read permission is removed for the content tree.

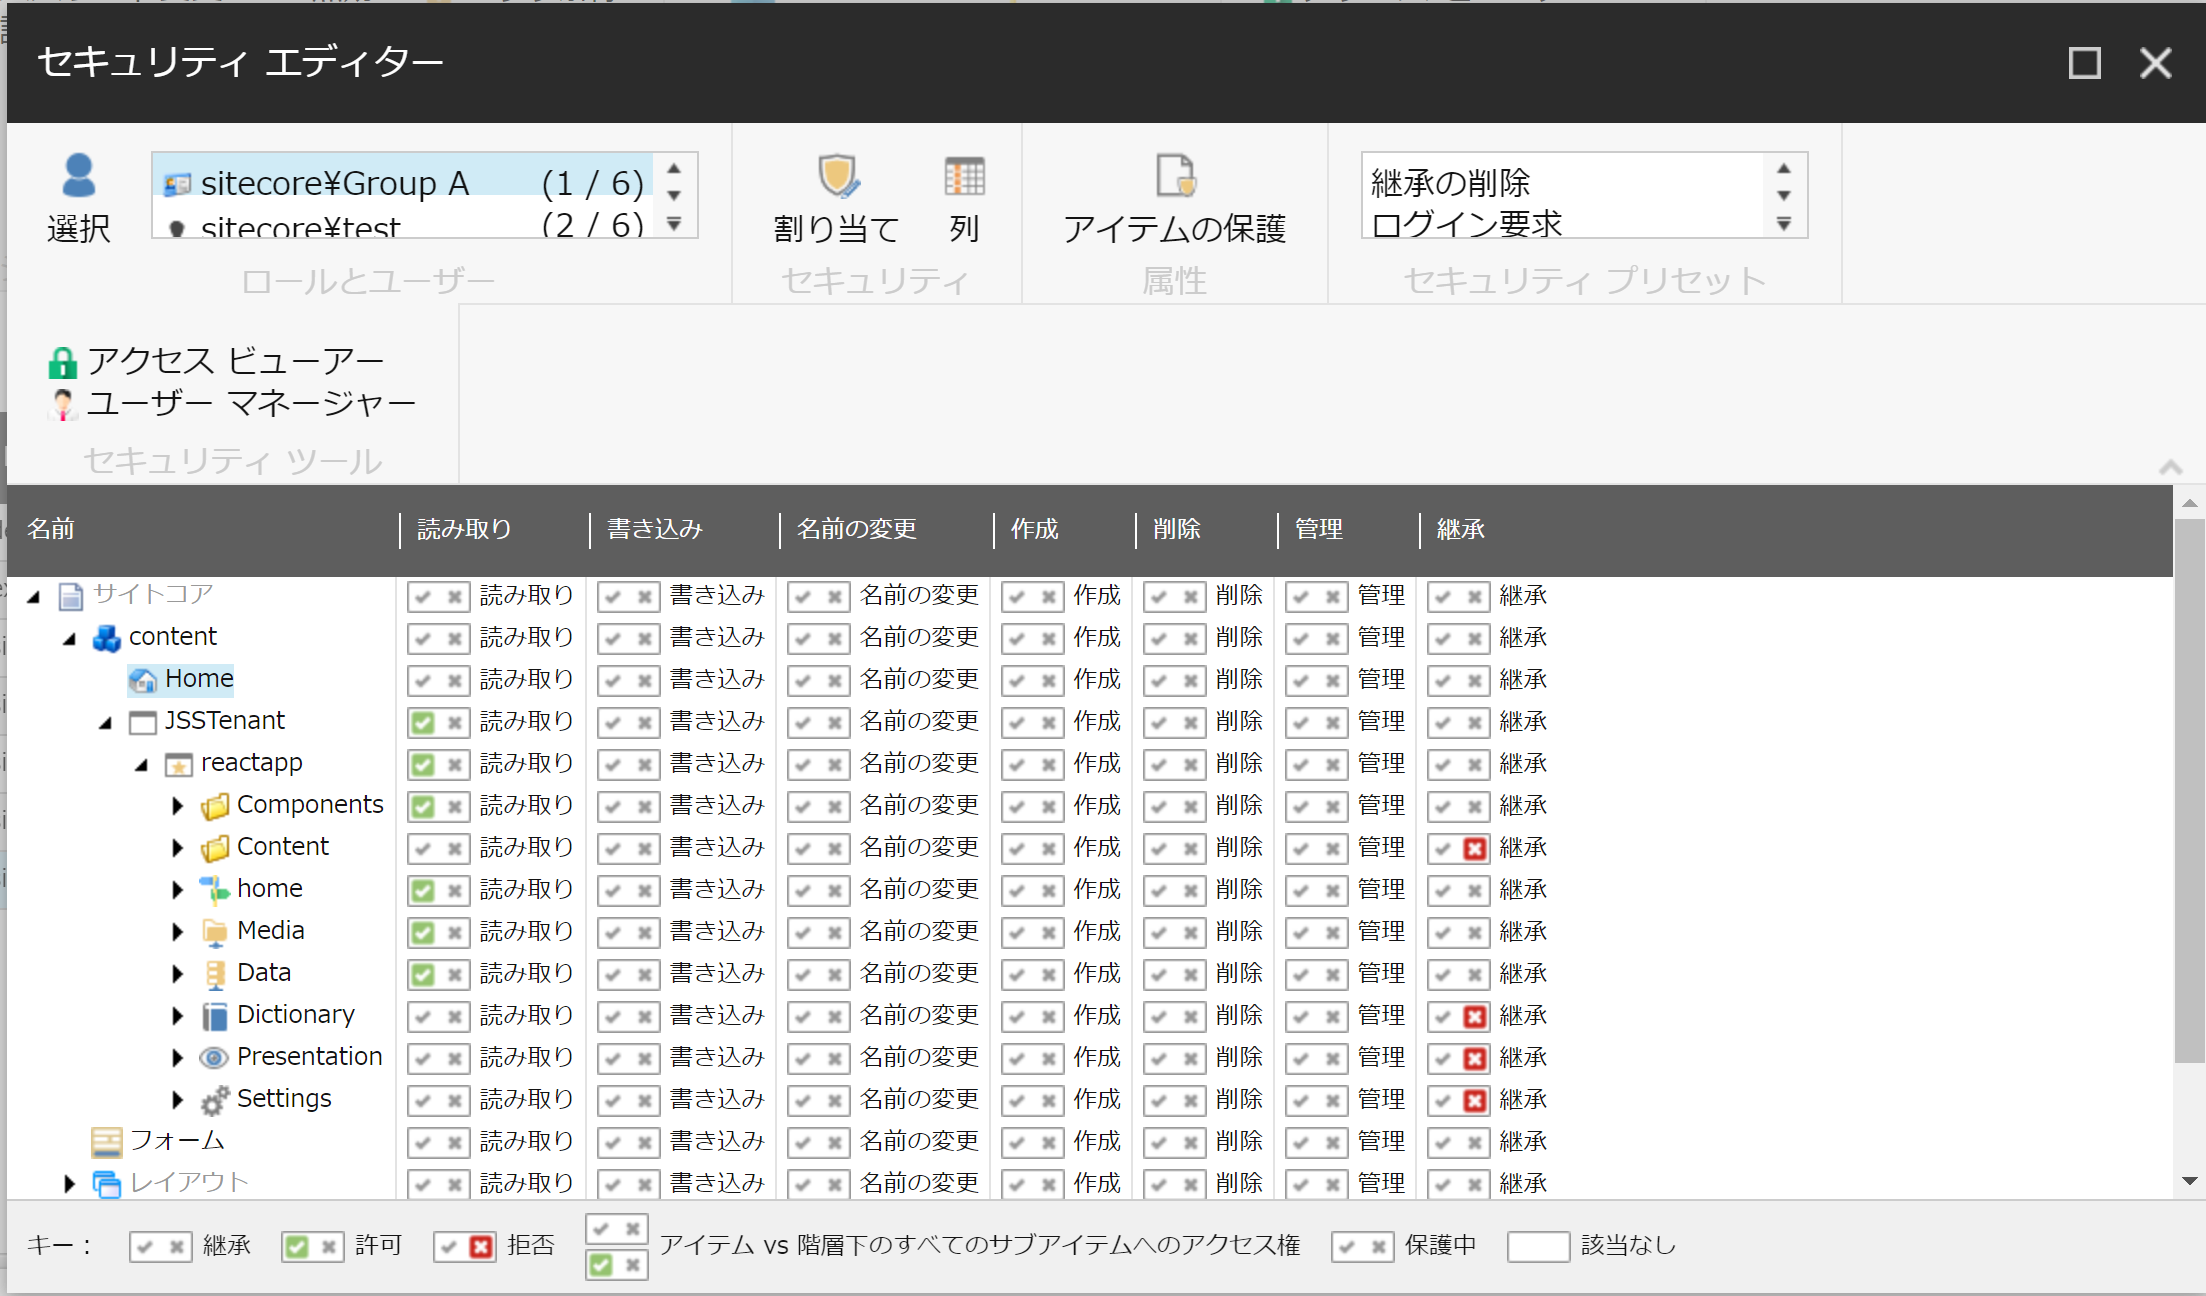
Creation of two roles
Then create Group A and Group B roles, again for comparison this time. Each has its permissions set in the security editor as follows

The differences are as follows
- Group A only Components readable
- Content readable in Group B only
- Groups A and B can read Home, Media, and Data
- Items that are not set to read are set to not inherit permissions
Assigning Roles to Users
Let's actually create a new test user. The first step is to create an account that belongs only to Group A.

This user will of course have the same privileges as Group A.

If the user has only Group B roles, the following naturally reflects Group B privileges.

What happens if you belong to Group A and Group B? The result is that you will have access to both of the privileges accessible by the two roles.

By combining two roles in this manner and adding additional privileges, the range of access can be increased.
Summary
Since both Group A and Group B have originally set up areas that can be referenced (in this case, Home, Media, and Data can be referenced by either role), users can generally be assigned a single role, and can reference and edit content within the range that can be referenced by that role. On the other hand, users can be assigned to multiple roles so that only those users who need to browse across departments can access a large amount of information.