
In this article, we will introduce the account setup for using Sitecore Content Hub. To manage your account, you can create a local Sitecore Content Hub account or use a single sign-on to connect to other systems.
Use of user management tools
Since this will be a user management setup, all will use "Users" as the administration page. Users can be accessed by opening the administration icon and then opening Users.

Module
Sitecore Content Hub offers different features depending on the contract. Therefore, user rights can also be defined in terms of which features are available.

The modules listed in the above screen are authorizations for the following functions
- Content – Content Marketing Platform
- Media – Digital Asset Management
- Product – Product Content Management
- Project – Marketing Resource Manager
- Print – Web 2 Print
- Salesforce – Salesforce Marketing Cloud
The above items are rights that depend on the product license. Now we will refer to user groups, which allow you to set general user rights.
user group
Users can belong to multiple user groups, each with its own set of permissions, and Sitecore Content Hub's approach to user group assignment is basically to add user permissions.

Here we will create a new user group. We will name the group Sample User Group and assume that the only available functionality is "Media".

Next, set the policy for the user group. To switch to the Policies screen, return to the User Groups list page and click on the Settings icon.


In addition, the following items can be selected for the user's privileges.

Assigning Users to Groups
In fact, create a user for verification. Here, we create a user named Sample User and assign the user group Sample User Group that we have just created.

Falsify and verify user permissions
In order to confirm what kind of reference is possible with the privileges of the user who actually created the file, the file is displayed with "Impersonate", which switches the user's privileges to use the user's privileges.

Here, the asset is displayed, but the asset details cannot be viewed. This is because you have read permission to the asset, but not the permission to use the asset details page.
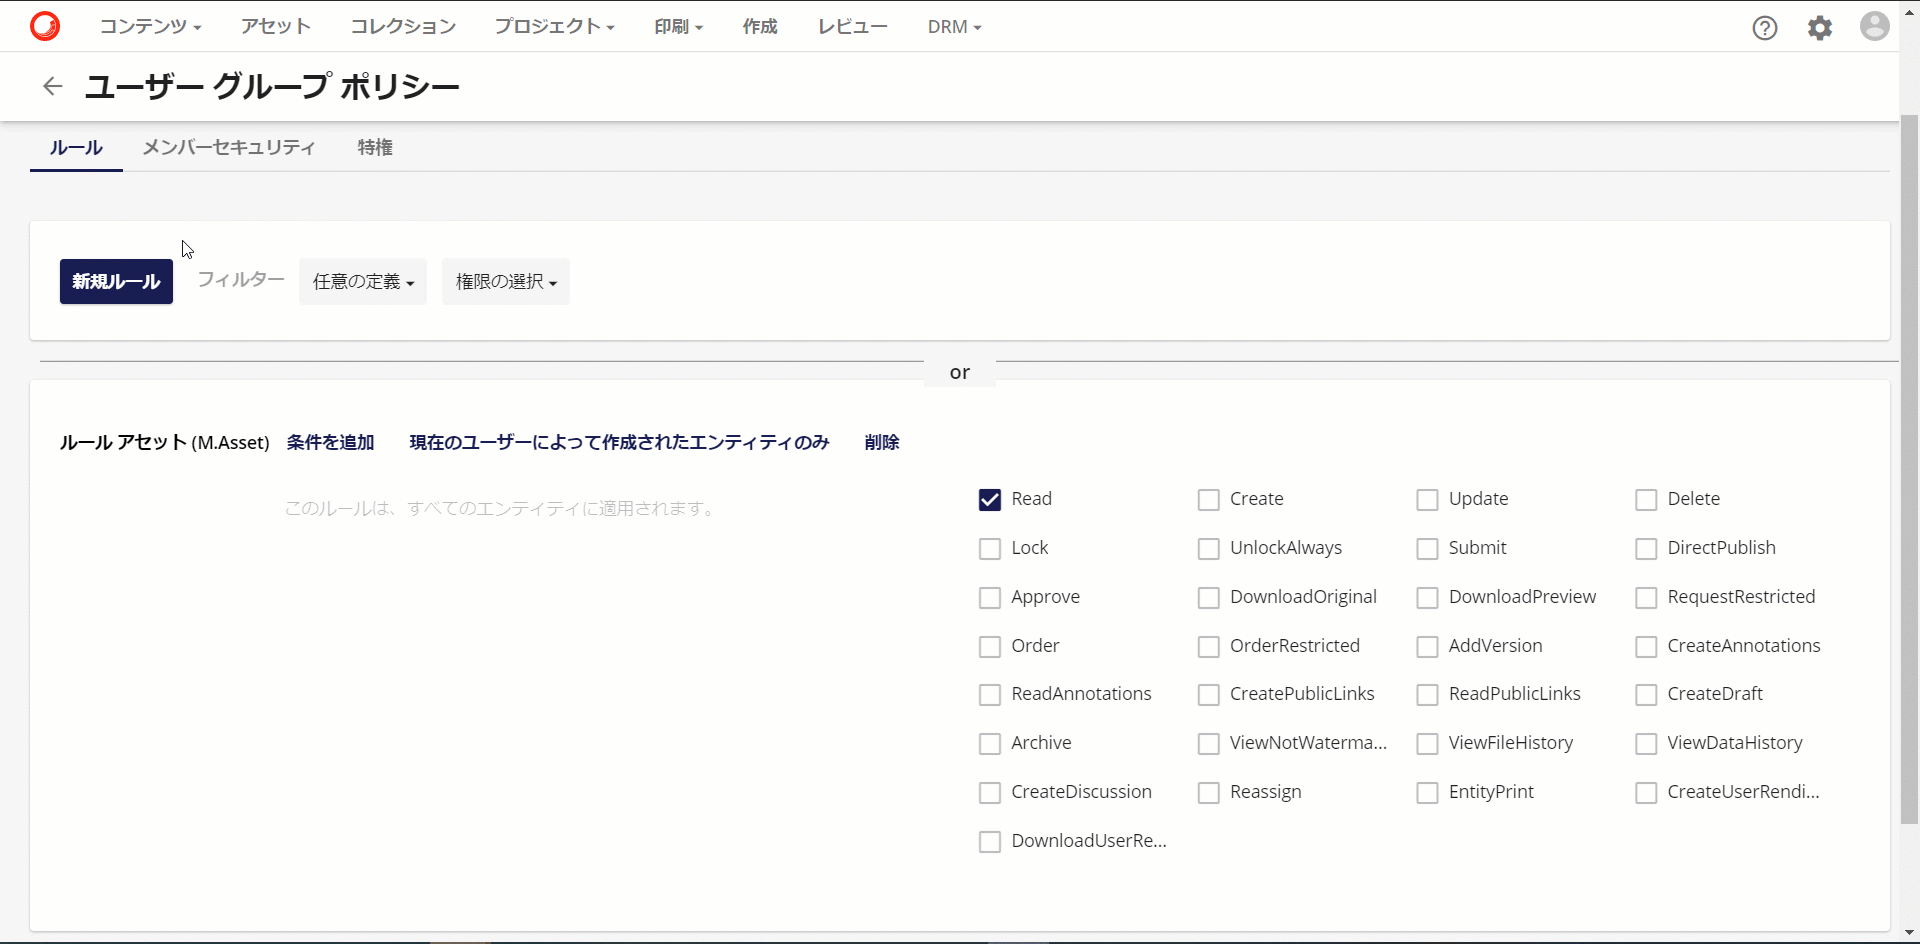
Adding privileges to a user group
Return to the Edit User Group screen and create a rule using the Portal.Page item, this time granting read permission to the "Asset Details Page".
Verified by test users
Again, switch to the test user to see if the asset detail page can be viewed.

Searching for an asset was completed using the asset detail page.
Summary
In this article, we have shown you how to set user permissions and how to check user permissions. By applying permissions to assets and permissions to pages to user groups, there is no need to set up individual users.