前回作成をしたヘッドレスのサイトはまだサイトコアのアイテムがあるだけとなっています。今回はこれに Next.js のプロジェクトを追加して、ページの編集ができるところまでの紹介をします。
Next.js SXA のプロジェクトを作成する
今回は Next.js SXA のプロジェクトを追加していきます。Version 21 からは以下のリポジトリにテンプレートを展開しています。
すでにコンテナベースの Sitecore を起動している場合は、まずは停止します。停止後、コンテナを動かすために利用していた src\rendering のフォルダを削除します。この段階で、src の下には何もない状況なのを確認してください。
ここでバージョンを指定してテンプレートを作成するために、以下のようにコマンドを実行してください(以下の数字は GitHub のリポジトリの番号になります)。
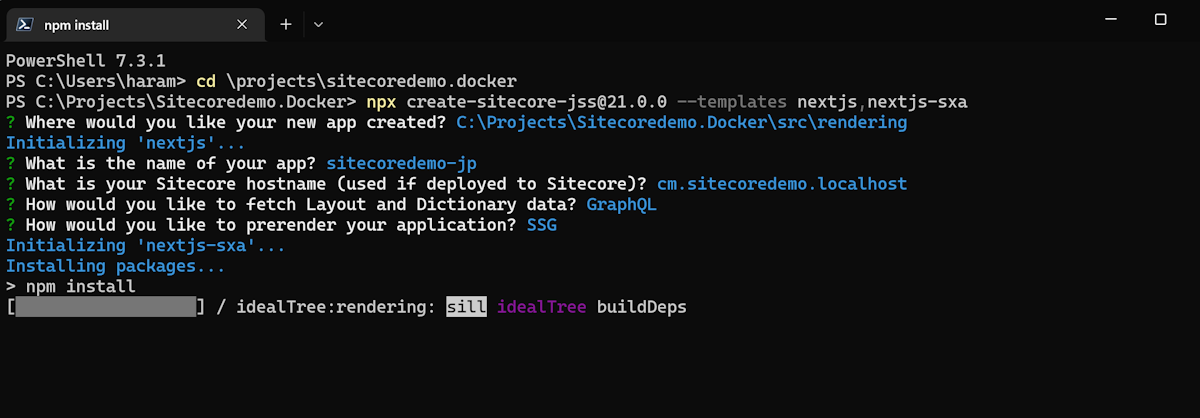
npx create-sitecore-jss@21.0.2 --templates nextjs,nextjs-sxaここからは、普通に Next.js のプロジェクトの設定を入れていく形です。ここから先のプロジェクトのフォルダは `C:\Projects\Sitecoredemo.Docker` としていますので、随時手元に合わせて実行してください。
インストール先のディレクトリの確認が表示されます。今回は、C:\Projects\Sitecoredemo.Docker\src\rendering を指定します。
アプリの名前の確認が表示されます。アプリの名前は、今回は sitecoredemo-jp とします。
CMS サーバーの名前を次に聞かれますが、 cm.sitecoredemo.localhost と設定します。
続いて GraphQL か REST のどちらのプロジェクトにするかを確認してきます。今回は GraphQL を選択します。
最後に SSG か SSR かの確認が表示されるため、SSG を選択します。
これでセットアップの手順が完了となります。自動的に npm install などが実行されます。
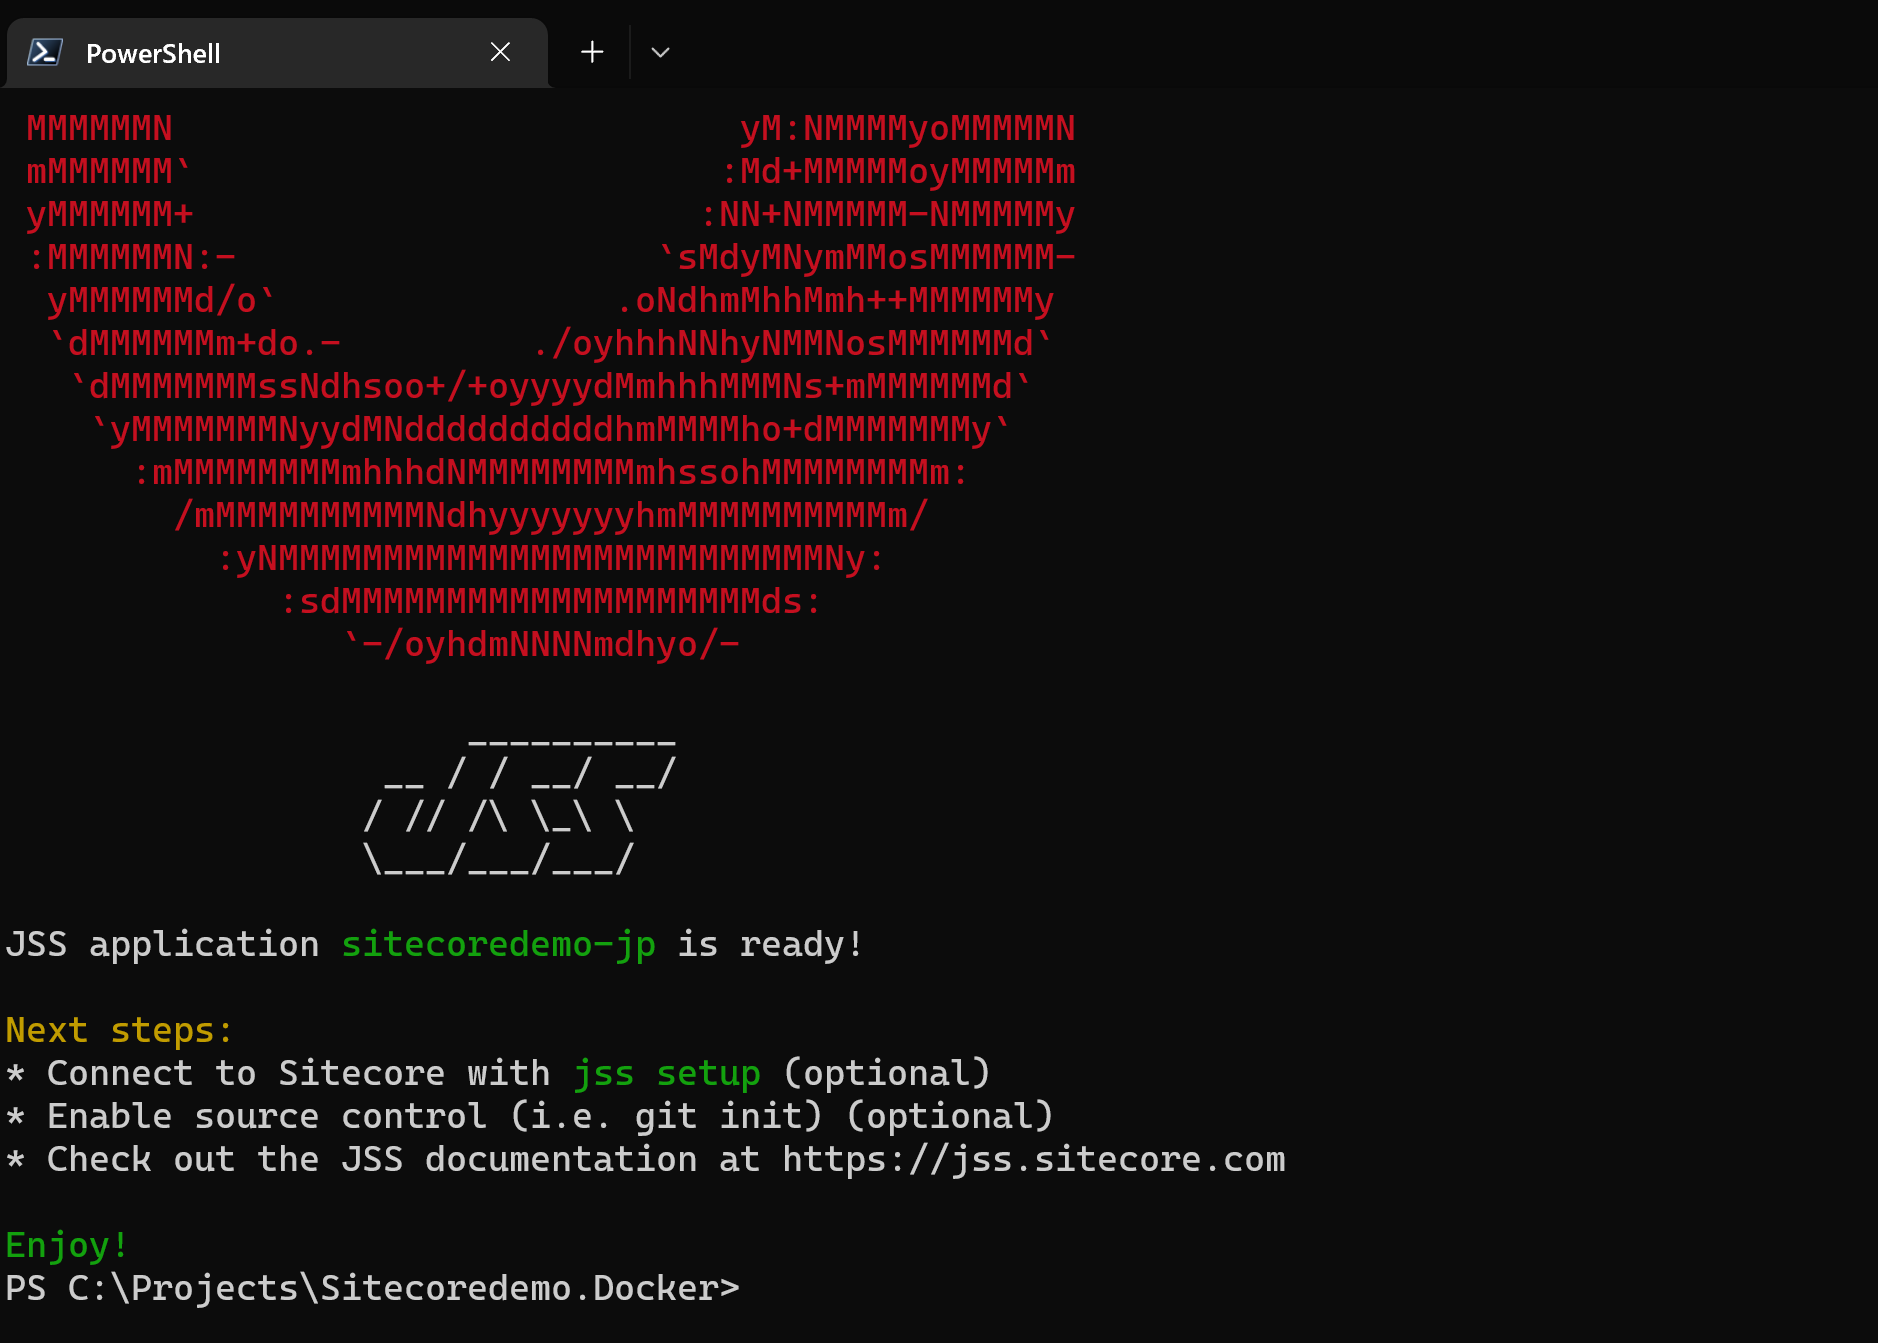
しばらくすると以下のようにプロジェクト作成完了となります。

これでプロジェクトが作成されました。
Next.js の設定を変更する
Next.js をコンテナに展開する際に利用するために、jss setup を実行する必要があります。
cd src\renderingjss setup以下のデータを設定していきます。
質問項目 | 設定 |
|---|---|
Path to the Sitecore folder | ..\..\docker\deploy\platform\ |
Sitecore hostname | https://cm.sitecoredemo.localhost/ |
Sitecore import service URL | https://cm.sitecoredemo.localhost/sitecore/api/jss/import |
Sitecore API Key | src\items\api-key\DockerStarter.yml の ID |
Please enter your deployment secret | .env の JSS_DockerStarter_DEPLOYMENT_SECRET |
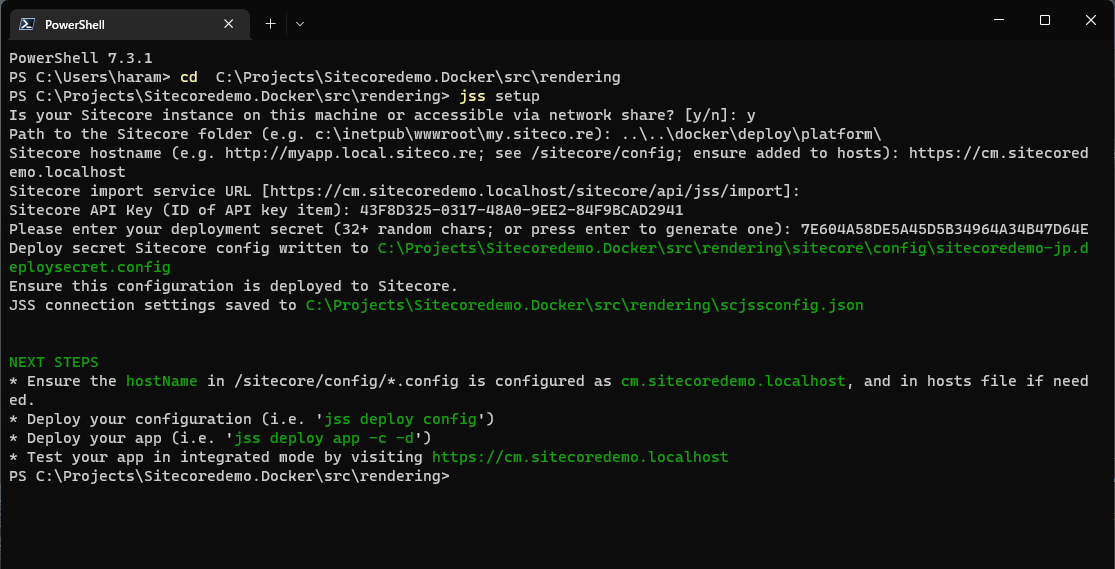
今回は DockerStarter でプロジェクトを作っているためパラメーターやファイル名に名前が入っています。別の名前で作成している場合は、上記の参照先を変更して値を設定してください。
作成された設定ファイルに関しては微調整をします。これは、作成をしたサイトを SXA のテンプレートを利用して展開しているためです。
まず、JSS EDITING SECRET の値を .env で定義されている JSS_EDITING_SECRET のキーに変更をしてください。またコメントアウトされているため、設定の値はコメントアウトから出してください。
      <!--
        JSS EDITING SECRET
        To secure the Sitecore editor endpoint exposed by your Next.js app (see `serverSideRenderingEngineEndpointUrl` below),
        a secret token is used. This is taken from an env variable by default, but could be patched and set directly by uncommenting.
        This (server-side) value must match your client-side value, which is configured by the JSS_EDITING_SECRET env variable (see the Next.js .env file).
        We recommend an alphanumeric value of at least 16 characters.
      -->

        <setting name="JavaScriptServices.ViewEngine.Http.JssEditingSecret" value="Your Key" />
続いて以下の設定に関して削除をします。
      <site patch:before="site[@name='website']"
            inherits="website"
            name="sitecoredemo-jp"
            hostName="cm.sitecoredemo.localhost"
            rootPath="/sitecore/content/sitecoredemo-jp"
            startItem="/home"
            database="master" />
App name のパスも変更をします。`sitecorePath` と合わせて localhost と記載されているホスト名を rendering に変更します。
        <app name="sitecoredemo-jp"
            layoutServiceConfiguration="default"
            sitecorePath="/sitecore/content/sitecoredemo-jp/sitecoredemo-jp"
            useLanguageSpecificLayout="true"
            graphQLEndpoint="/sitecore/api/graph/edge"
            inherits="defaults"
            serverSideRenderingEngine="http"
            serverSideRenderingEngineEndpointUrl="http://rendering:3000/api/editing/render"
            serverSideRenderingEngineApplicationUrl="http://rendering:3000"
/>export class DictionaryServiceFactory {
create(): DictionaryService {
return process.env.FETCH_WITH === constants.FETCH_WITH.GRAPHQL
? new GraphQLDictionaryService({
endpoint: config.graphQLEndpoint,
apiKey: config.sitecoreApiKey,
siteName: config.jssAppName,
rootItemId: '{B566D9E5-B3EA-4D35-8825-D578582607E1}',
/*
The Dictionary Service needs a root item ID in order to fetch dictionary phrases for the current
app. If your Sitecore instance only has 1 JSS App, you can specify the root item ID here;
otherwise, the service will attempt to figure out the root item for the current JSS App using GraphQL and app name.
rootItemId: '{GUID}'
*/
})最後に、src\rendering\.env のファイルを変更していきます。以下の項目にそれぞれの値を設定してください。
JSS_EDITING_SECRET
SITECORE_API_KEY
SITECORE_API_HOST
上記の変更が終わったあと、以下のコマンドを実行してコンテナに反映させます。
jss deploy configサイトコア側の設定
上記の設定が完了したところで、Sitecore を起動します。
docker-compose up -d起動したあと、/sitecore/system/Settings/Services/Rendering Hosts/Default のアイテムが空欄になっていることがわかります。以下のように設定してください。これは、すでに設定をした docker\deploy\platform\App_Config\Include\zzz\sitecoredemo-jp.config の値と同じデータを設定します。
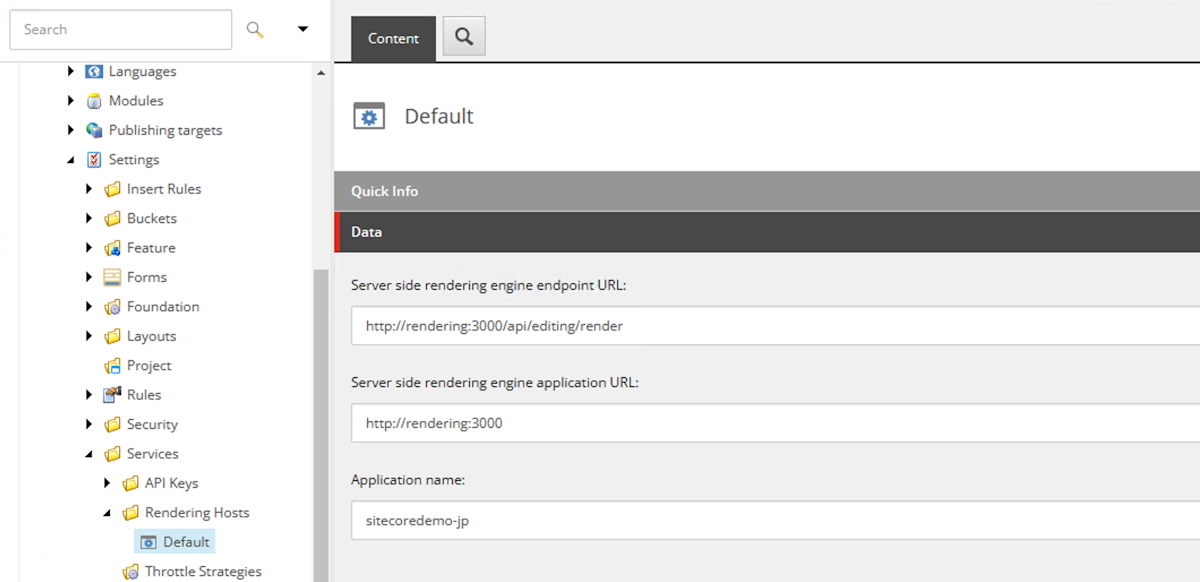
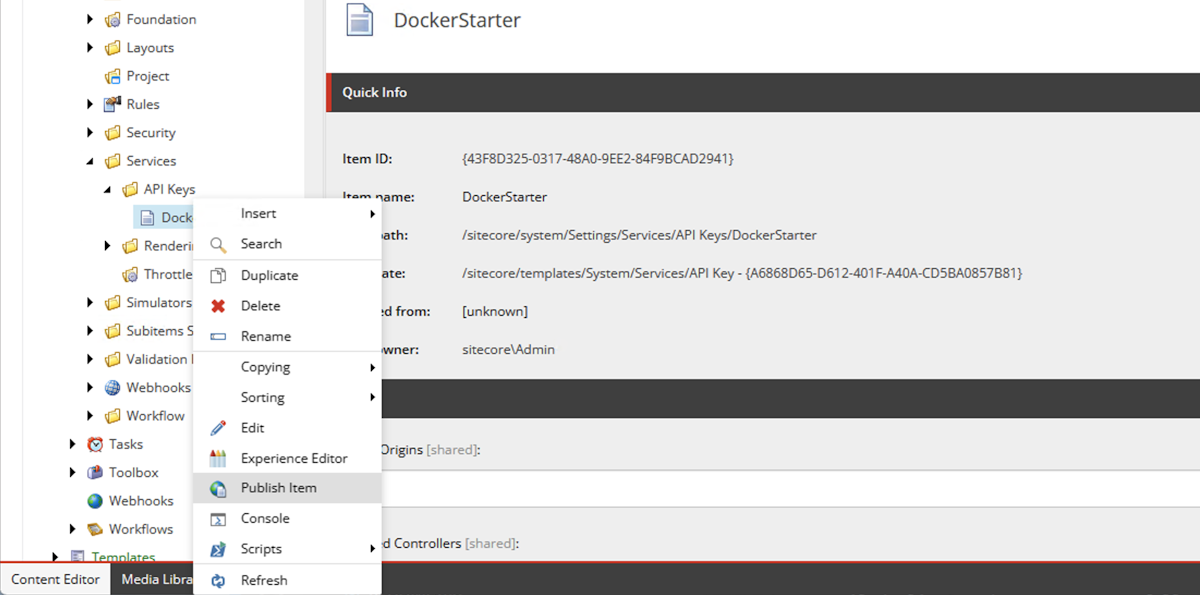
最後に、API キーを公開してください。
これで設定は完了です。
動作確認
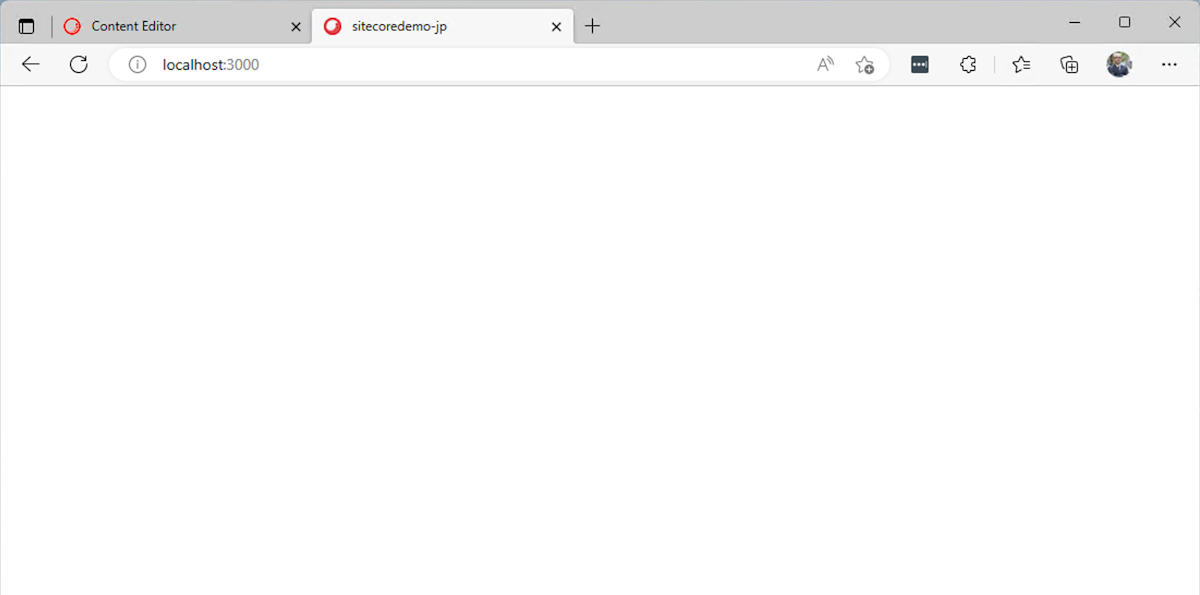
まず最初にローカルの Next.js を Sitecore に接続をします。Next.js のプロジェクトに移動をして、 .env のファイルの設定が入っていることを確認して、以下のように実行します。
cd src\renderingjss
start:connected
しばらくするとウィンドウが開いて以下のように空っぽのページが表示されます。
アイテムのタイトルを変更すると、ブラウザのタブで表示されている文字が変わることがわかります。
続いて、Home アイテムを利用してエクスペリエンスエディターを開きます。
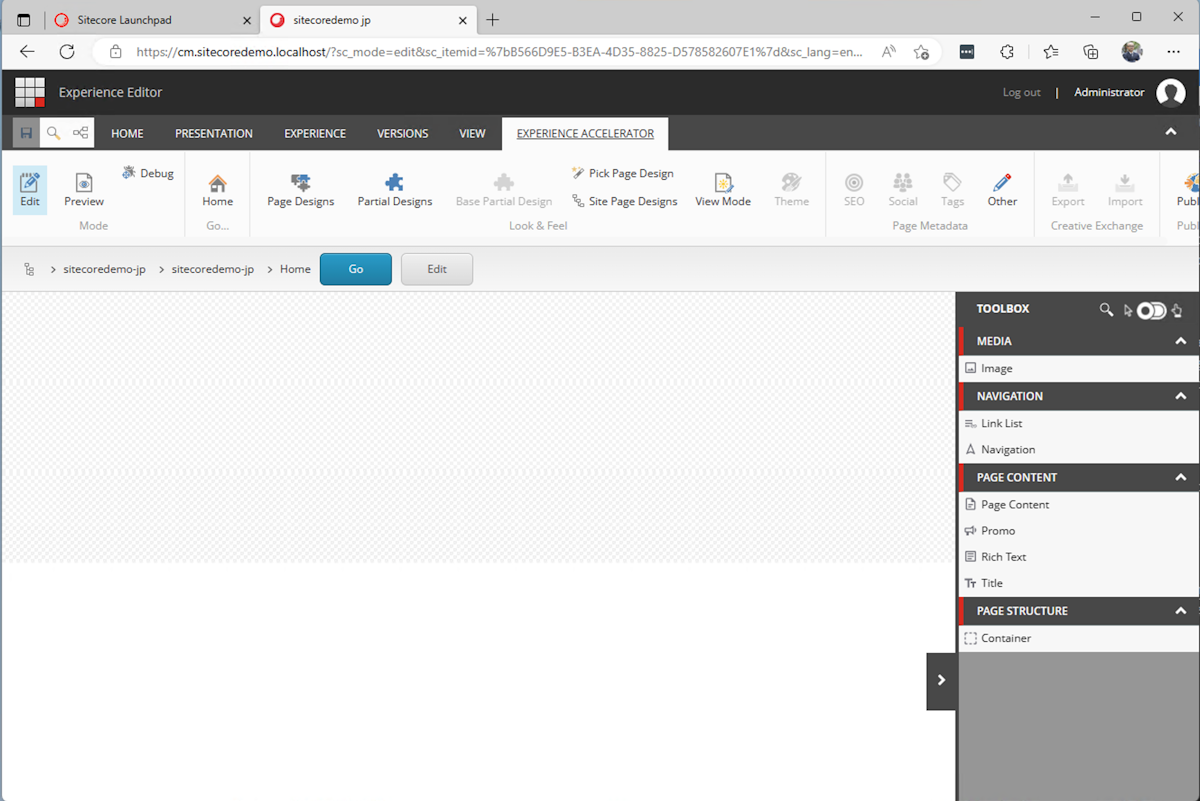
ホームのアイテムにはまだ何もコンテンツを配置していないため、ブランクのページが表示されます。また、右側には Toolbox が展開されており、標準で用意されているコンポーネントを利用することができるようになりました。
まとめ
今回のように、Sitecore XM 10.3 でも Headless SXA を利用することができる環境を作ることができました。すでに Sitecore のライセンスを持っている、新規に立ち上げるがとりあえず Sitecore XM を利用する、といった場合に、Headless SXA を利用することで将来的に XM Cloud にも移行しやすくなります。次回はこれまで作成してきたプロジェクトを整理して、簡単に起動できるようにもう少しリポジトリの内容を整理していきます。